Climbing roses flower on new growth, so all this year’s growth can be pruned back now to create an open, healthy framework from which the new growth next spring will grow. As with all pruning, firstly remove any dead, damaged or diseased stems. Next uncross any tangled stems and create a fanned-out framework. Stems need to be tied in securely to whatever the rose is climbing (wires, trellis, pergola etc). Once you have assessed the shape and removed any crossing stems that can’t be separated and fanned out, you can begin cutting back the side stems leaving just a couple of leaves.
In practice, it can be easier to cut the side shoots down before you fan out the main stems and tie them in. This creates some space so you can see the main stems more clearly. When fanning these out, you want to get them as horizontal as possible. This will mean more flowering shoots are sent out and you will have a fuller plant with more flowers next year.
Beware of the thorns and wear suitable clothing to protect yourself as a scratch from a thorn can cause a nasty reaction as one of our team recently experienced. When tying in the plant, make sure that you use a natural twine or soft coated wire. Thin wire can cut in to the plant, especially as the stems thicken, which makes disease more likely.
Once you are finished, gather any fallen rose leaves and get rid of these from your garden. This will reduce the spread of black spot. Check that the roots of the plant are well covered and that it is planted well, with no rocking or large gaps around its base in the soil.
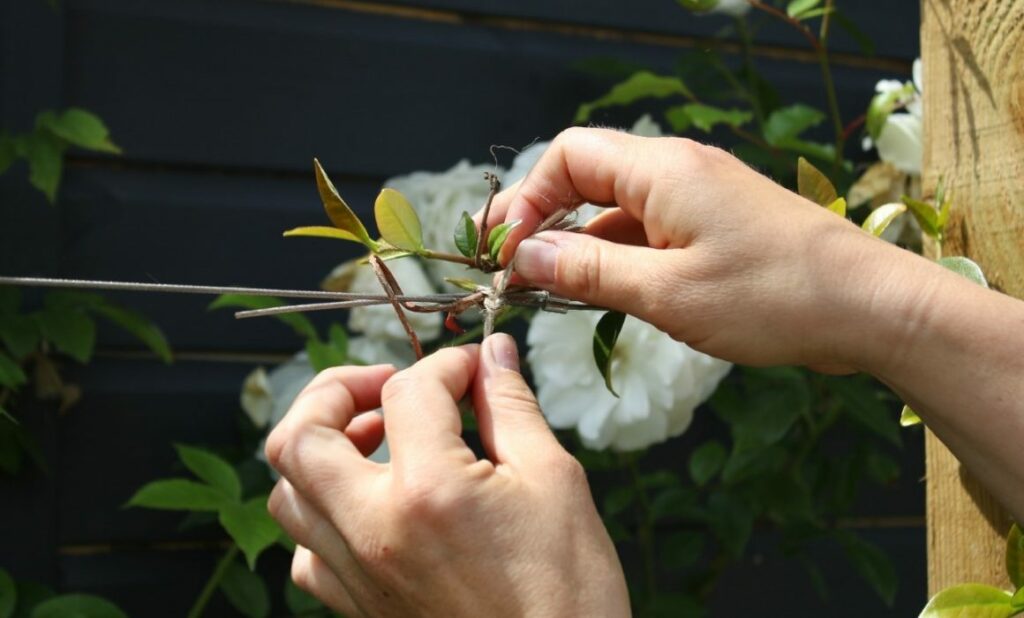
Prepare climbers for windier weather by checking they are tied in securely. This will help to prevent the roots of the plant being disturbed by the weather, as any long, un-secured stems can be caught by the wind which puts pressure on the roots as well as the stems themselves – potentially causing snapping of stems or loosening of roots.
Check that any newly planted specimen shrubs and trees are planted firmly in the ground, and that their supports are sturdy and in the right place. As the strength of the wind will increase as the season progresses, we are looking to make sure that the plants won’t become uprooted or damaged by it.
Now is a great time of year to move and/or plant plants. The earth is still warm so roots will be able to grow straight away, helping the plant to settle in quickly in its new home.
If you are planting new plants, make sure you give the roots a tickle so that they spread out into their new spot, rather than continuing to grow round and round as they may have been doing in the pot. Just rub your hand around the edges of the roots breaking them up a little. Water them in well.
If you are moving plants, take care when you dig them up to get as much of their root mass as possible and replant them as quickly as you can. Water then in well and do so weekly until we have regular rainfall.
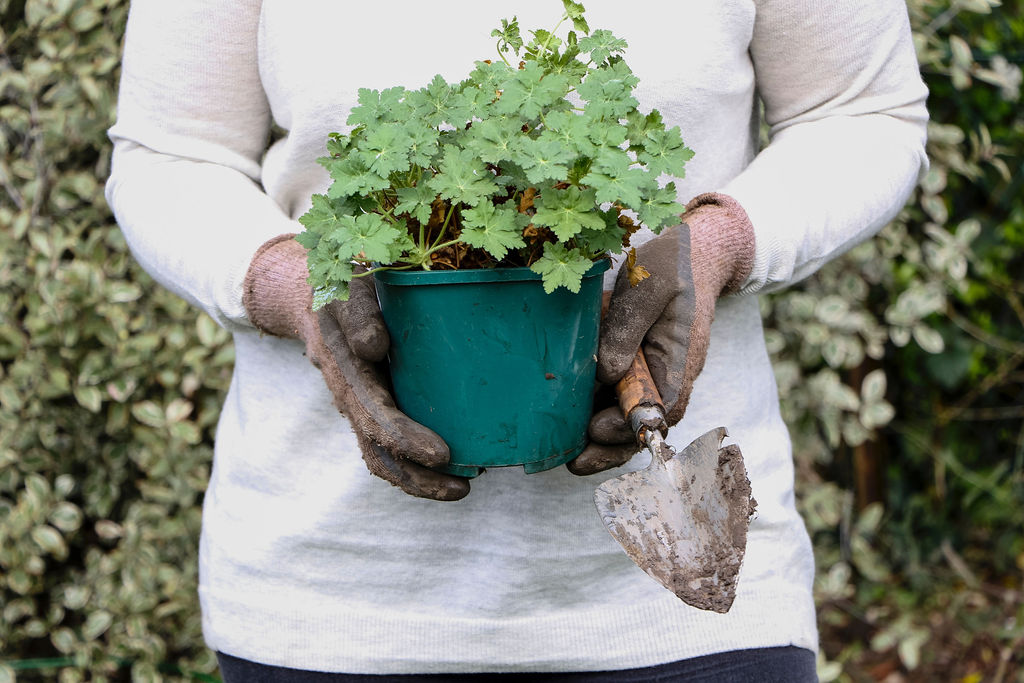
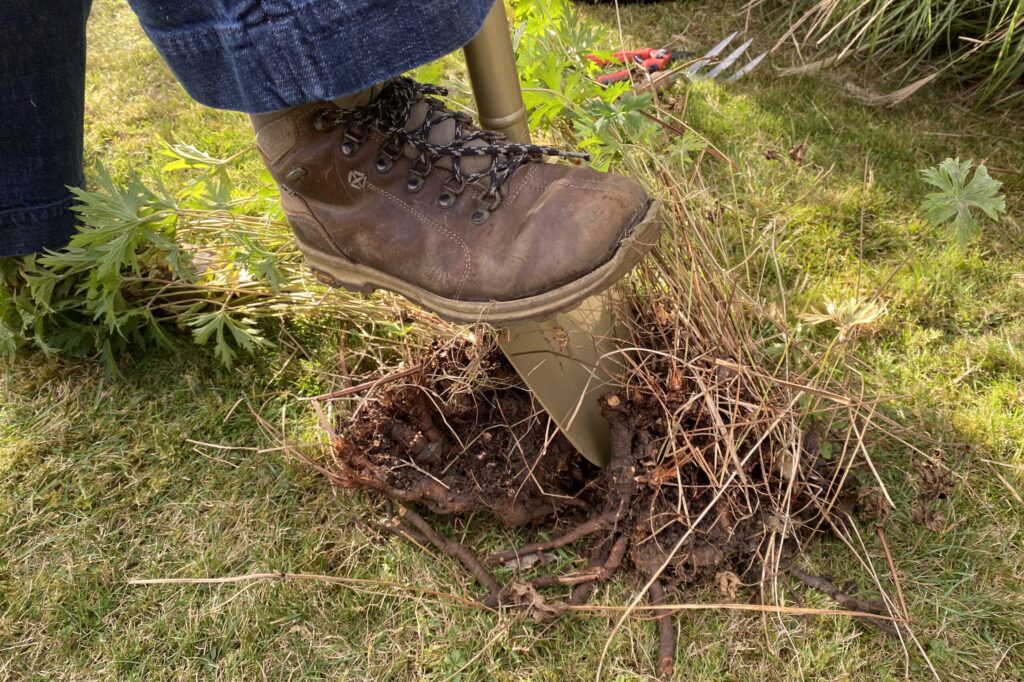
If you have any herbaceous perennials that have become congested or too large for their space, you can divide them. Some plants, such as gaura and phlomis are better left until Spring. But plants like hardy geraniums, geum, nepeta and rudbeckia can be divided now. If you are not sure where you want to put the extra plants, you can pot them up and keep them in a slightly sheltered spot protected from wind over winter (make sure they’re watered) and then plant them in the spring.
Dig up the plant with as much of the rootball intact as possible. Look for any natural separation in the roots, but don’t worry if there isn’t one. Using a sharp spade and a firm foot, slice through the rootball – depending on the size of it you could divide it into 2, 3 or even 4 new plants. For really congested roots, two border forks placed back to back and stamped on, then forced apart, can work well – or you can even use a pruning saw!
If you haven’t ordered yet – please do so now before they all run out! And whilst you can start planting many bulbs now, such as Crocus, Daffodils, Camassia and Alliums, it is important not to plant Tulip bulbs until the weather is reliably cooler – usually mid November onwards (up to Christmas). This is because in warmer soil they can develop tulip rot. So if you have planned a plethora of bulbs including Tulips, it is easiest to wait and plant them all together – just make sure you get them out of heir boxes straight away and spread the bags out in a cool place such as a dark shed. If you are looking for some bulb inspiration we have some for you here and another article highlighting bulbs for different areas and gardens.
At this time of year, there are some plants that are ready to be cut back and others that should be left alone for winter. Herbaceous perennials that die back and go a bit mushy over winter should be cut back. This includes Nepeta and hardy/perennial Geraniums. Once they have stopped flowering and their leaves are browned, you can cut them right back to the base and wait for new growth to emerge in the Spring.
More tender herbaceous perennials such as Penstemon, Gaura and shrubby Salvia will also die back somewhat but at least some of the stems need to be left in place to protect the crown of the plant over winter. We like to cut back by about a third to a half once they have finished flowering, to stop them looking too untidy but still provide that protection. Many of these plants may still be flowering so this is usually a November job, once flowering has finished. It is worth saying that we lost several Penstemon and shrubby Salvia in the harsh winter of 2022-2023, whether they were partially cut back or not at all – so fingers crossed that we don’t get such an extended period of cold and snow this winter!
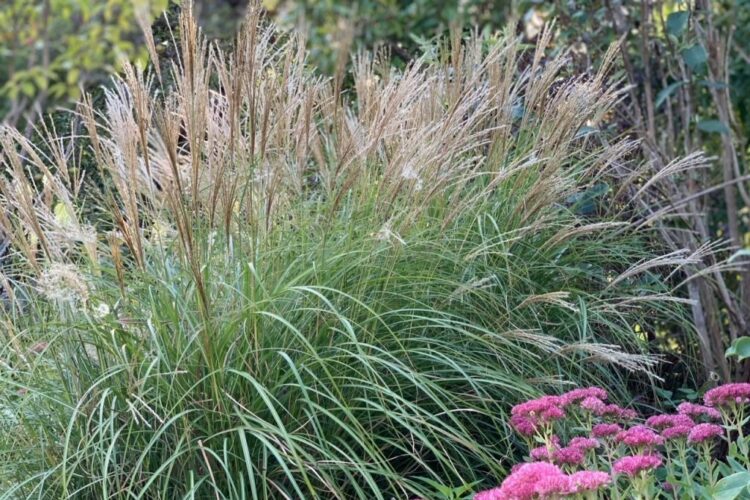
Lastly there are many herbaceous perennials we like to leave standing to provide winter interest in the garden and spaces for wildlife to shelter. These include ornamental grasses, Echinacea flower heads (dead foliage can be tidied), Sedum, Phlomis, Verbenas and Veronicastrum (stems can be reduced in height if they are flopping over, but it’s good to leave some in place). The seed heads provide a structural and sculptural quality that can be enjoyed over the winter months, as well as providing food for birds and stems for insects to shelter in.
As leaves start falling, you may feel the urge to sweep them all away – stop right there! We really encourage you to leave some piles around your garden or in the backs of borders, or under trees. They’re important habitats for insects, hedgehogs and frogs to overwinter in and so very beneficial for your garden.
With leaves that you clear from patios and the lawn, you can make leaf mould – free plant feed which is super easy to make and very useful to have for your garden. You will need a simple cage container for the leaves – just four stakes for the corners and chicken wire between them to make the walls. Around 1m2 is a good size to start with, but you may wish to create a larger cage if you have lots of falling leaves in your garden.
To make the leafmould, simply rake the leaves (or use the mower to shred and collect them, meaning they will break down more quickly!) and put them into the storage cage. You can also chop the leaves up using shears – as well as speeding up their breakdown this will also reduce their volume so that you can fit more in.
Within a year or so you will have high quality organic matter to use in the garden for improving soil, mulching or as a seed compost. If you create your cage on earth, be sure to lay a thick layer of card or membrane at the bottom to suppress any growth coming up into the leafmould. You could reuse spent compost bags for this.

If you don’t have space for a leafmould cage, or you don’t have many leaves, you can also use a hessian sack, or an old compost bag (or similar) with holes punched in to store the leaves. Prepare the leaves in exactly the same way, dampen the leaves if they are dry and then tie the top loosely. Hang up the sack in a shed or garage, or stack out of sight.
Beware of diseased leaves. If you have any plants with fungal diseases (often characterised by spots on the leaves) gather and dispose of the diseased leaves – do not use them to make leafmould as the diseases will survive. Some examples of diseased leaves commonly found in gardens but to avoid using in any sort of compost production are roses with blackspot or hawthorns with leaf spot.
Lastly, not all leaves are equal when it comes to making leafmould. Evergreens and conifers are best added to compost heaps as they will take a long time to break down. Thicker deciduous leaves such as sycamore or horse chestnut are best chopped up or shredded first to speed up their breakdown. Beech, hornbeam and oak are said to be the quickest to break down and make for a very good quality leafmould.
Over the wetter months, pots can become waterlogged. Not only is this bad for the plants in them but it can also mean there’s a higher chance that the pots will crack when it freezes. Check that drainage holes are clear and, if needed, raise the pots on to feet to allow for free drainage when it rains.
We are nearing the last mows now. Growth is slowing. We recommend cutting your lawn on a medium to long setting and neatening the edges now, as well as aerating it. This will help reduce compaction thus allowing the roots of the grass to grow more easily. It will also help water and nutrients to reach lower into the soil.
Despite the cooler temperatures and rain we have had, it’s still essential to check your pots and newly planted gardens for drought. Pots will more than likely need water as the canopy of the plants often stops the rain getting into the soil, even during really rainy periods. Unless we are lucky enough to get long and gentle rain every few days, newly planted gardens will also need watering – especially larger specimen trees and shrubs – so do check on them regularly. Once your watering is done, here are a few more jobs to enjoy this month.
Later in the month, when the temperatures are cooler, you can start planting your bulbs (hold off on tulips though). If you haven’t ordered them already, we recommend you do so now! Many varieties sell out so it’s worth looking soon to avoid disappointment. We recommend Peter Nyssen as they sell bulbs that haven’t been treated with neonicotinoids and package them in compostable bags as well as having an excellent selection. If you are looking for inspiration on what to plant, we have written more about bulb choices here.
It’s worth taking a little time to think about where to add bulbs in your garden. They are often the first pops of colour and provide early nectar for pollinators. You can choose bulbs that will flower from as early as February which is always a welcome sight in the garden. If you choose a careful mix of bulbs, you will be able to have something flowering from February through to at least June.
Many hedges and shrubs can be pruned now.
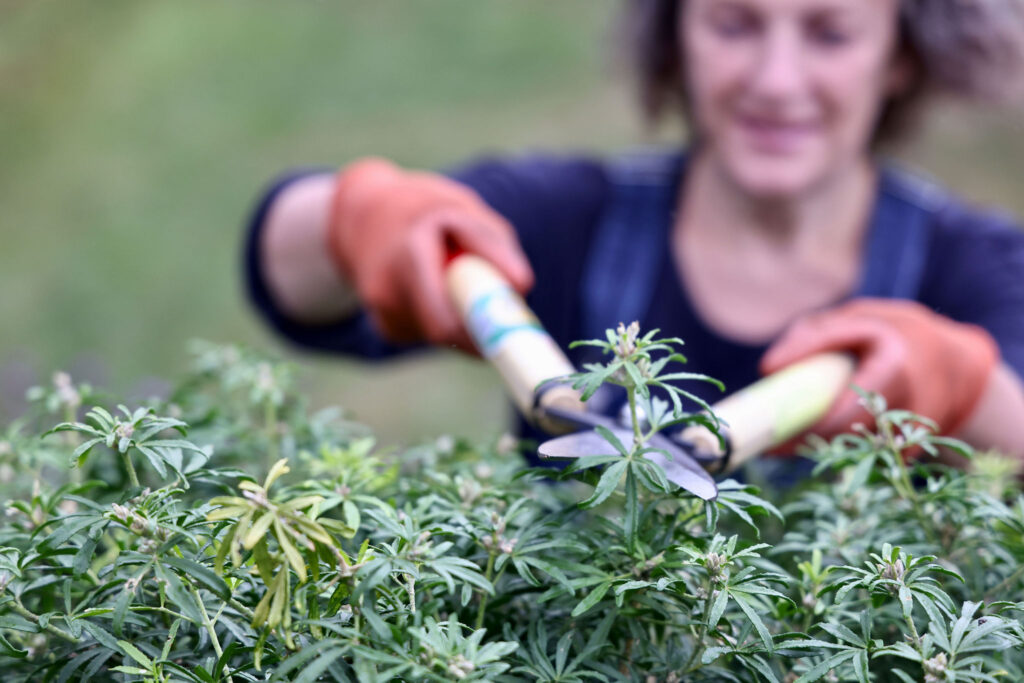
A general tidy can be given with shears, and more precise cuts made with secateurs or loppers. Make sure their blades are clean and sharp to neatly cut the plant rather than tearing it which can be unsightly and create sites of weakness where diseases can more easily set in. When cutting hedges or shaping shrubs, keep stopping to check your progress and that you’re cutting in a straight line/the desired shape.
Once the flowers are fading on your lavender, it’s time to prune it. You want to do this to make sure the plant doesn’t get too leggy. Cut back the plant to a compact shape leaving a few shoots on each stem. Lavender doesn’t typically regrow from bare wood, so be careful not to cut down too far.
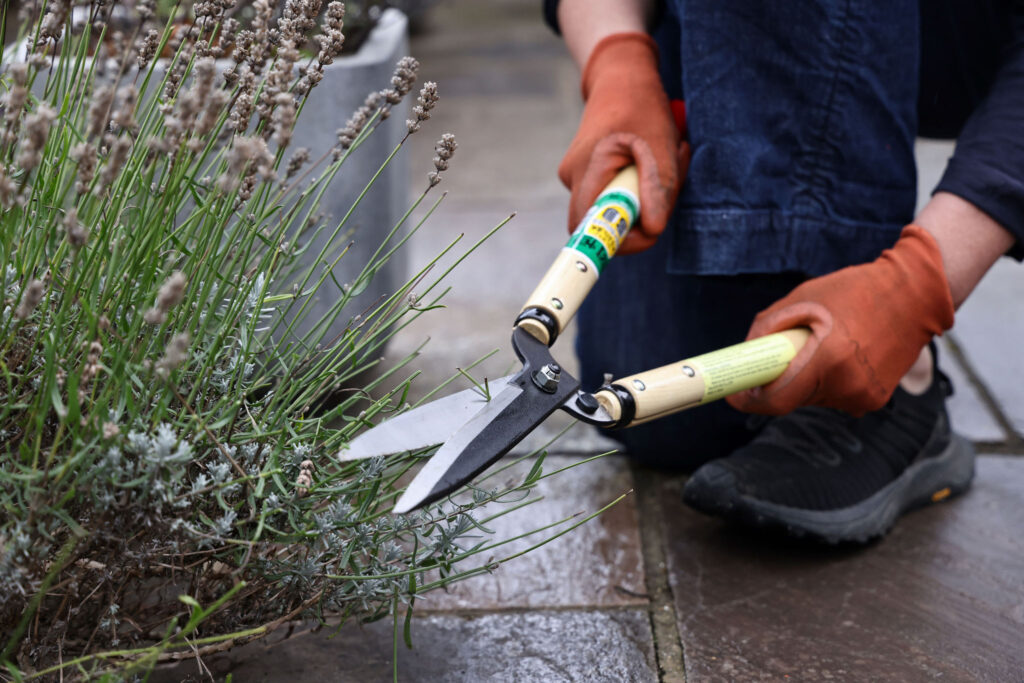
This is a job for later in the month when it cools down. There is increasing advice to move perennials in the autumn rather than the spring. Springs have been drier and so moving the plants ahead of the wetter season, i.e., in autumn, so that they have some time to establish root systems before winter means they will be better prepared in spring to put on new growth and grow well that year without so much rain.
If you want to move or divide any perennials, lift the plant getting as much of the root system as possible. A good rule of thumb is to dig at around the width of the plant above ground using a spade or garden fork. If the plant has become too large or congested, you can divide it at this point and have some new plants for free! If your plant is still in flower, it is still ok to move it, and it will mean that you can see how the plant will look in the new site. However, after you have relocated it, you should cut it back in order that it can focus its energy on root growth. While it’s a shame to lose the flowers, you could make an arrangement for the house with them, and you will thank yourself next year when the plant will hopefully be healthier and stronger for establishing its root system now.
Plants that benefit from division every few years or so include geum, astrantia, perennial geraniums and agapanthus. Once you relocate them, be sure to give a good water to help the plant establish well. If you’re not sure where you want to put your new plant, you can pot it up and decide next year. Be sure to look after the potted plant well to give it the best chance of survival though! Leave standing any plants that will provide winter interest – plants such as gaura, rudbeckia, sedum, ornamental grasses and achillea. They can be divided in the spring once you have enjoyed the structure and texture they provide over winter.
This year seems to have a been a bumper year for bindweed. We have seen it thriving and have spent a lot of time trying to keep on top of it in effected gardens. It’s an important weed to keep on top of because of the way it grows. By binding around other plants, it can damage them and it can also entwine itself in root systems underground too. The best way is to weed little and often. Every time you see it, weed it out and try and get as much of the root system out as possible. If you don’t have time to get out every couple of days, you could try trying to train it up a bamboo cane instead of nearby plants which then makes it easier to weed out when you can. This isn’t a failsafe method but does help to decrease it wrapping itself around intended plants.
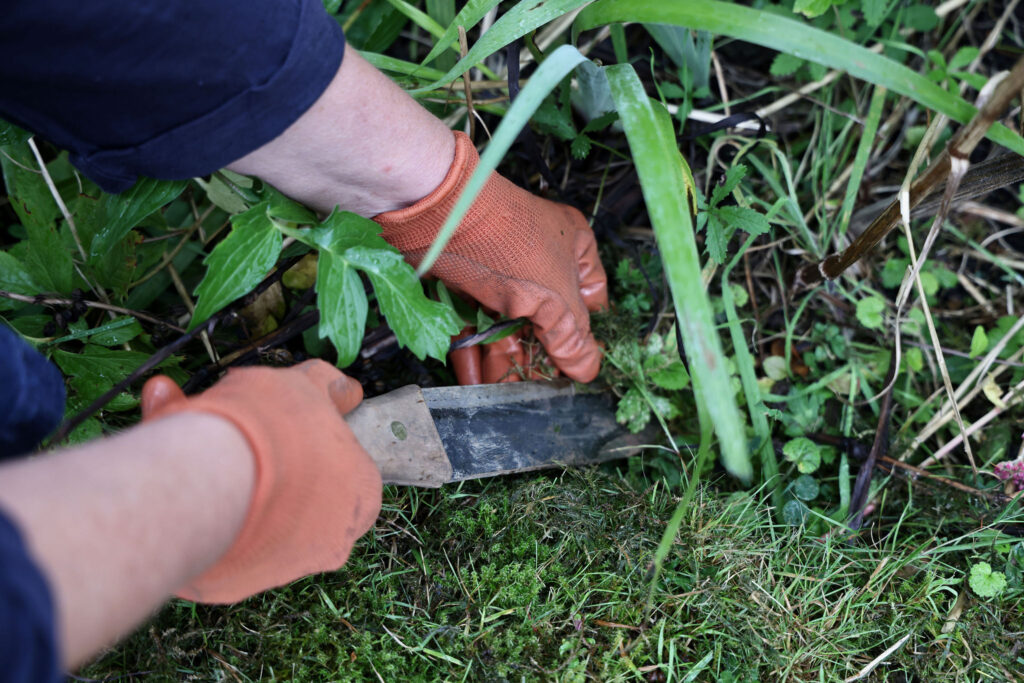
Other unintended wildflowers – aka weeds – should be weeding out too. Anything that is competing with intended planting or likely to self-seed prolifically and take over should be removed. We find using a tool called a hori hori to be the most effective way to remove most weeds . It’s one of our favourite items in our toolkits – the whole team has one and and wouldn’t be without them!
Lastly, now is a good time to give your lawn some love. Bare patches can be repaired using seed or even sections of turf if the damaged areas are large. You can thatch the moss off of the lawn if you wish to have a very neat finish (do leave this around though as it’s an important material for birds to make nests with). Lawns can be aerated too. This can simply be done with a garden fork. Poke holes at intervals of around 30cm. You can fill these with sand which is especially beneficial if your lawn is very compacted or on heavy soil. The addition of the sand helps with the soils’ drainage and allows the grass to grow better. If you already have very sandy soil, you won’t need to do this.
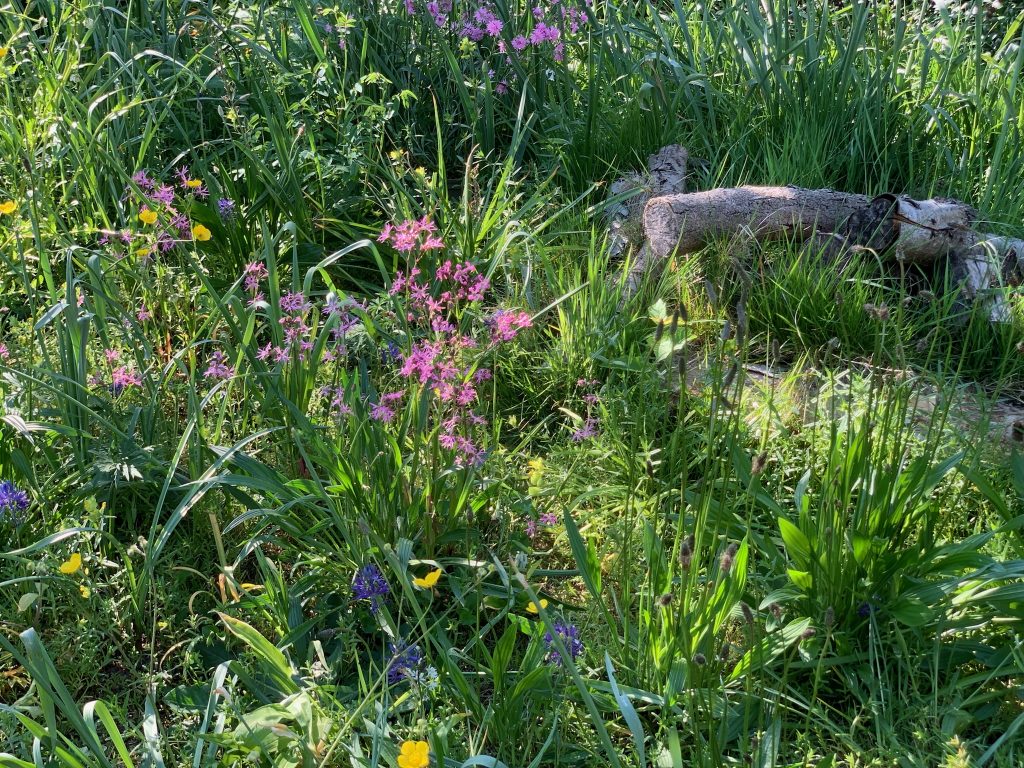
While you are thinking about your lawn, you could also consider whether you might like to create a mini meadow. Often lawns are a default in a garden. While they’re wonderful for playing on, and for creating negative space, for many they are unused spaces. We think creating a wilder lawn or mini meadow is a lovely idea. Not only does it add interest to your garden, but it adds diversity, encourages pollinators and once established is lower maintenance than an immaculate green lawn. If you are interested in how to do this, we have written an article with lots more information here: How to create a meadow lawn.
The first job is something you can tick off straight away! No Mow May. This initiative from Plantlife encourages us to not mow our lawns in May – either the entire thing, or a section of it. It’s something we think is a brilliant idea and have written about it in more detail here: No Mow May – Why you should take part. It could lead to something as beautiful as the below meadow, which started with simply not mowing a section of lawn.
Many of your spring bulbs will be coming to an end now, if not already. To give them the best change of blooming again beautifully next year, you should deadhead them. Cut off the flowering stem so that the plant doesn’t waste any energy producing seeds. Instead, its energy can be put back into the bulb.
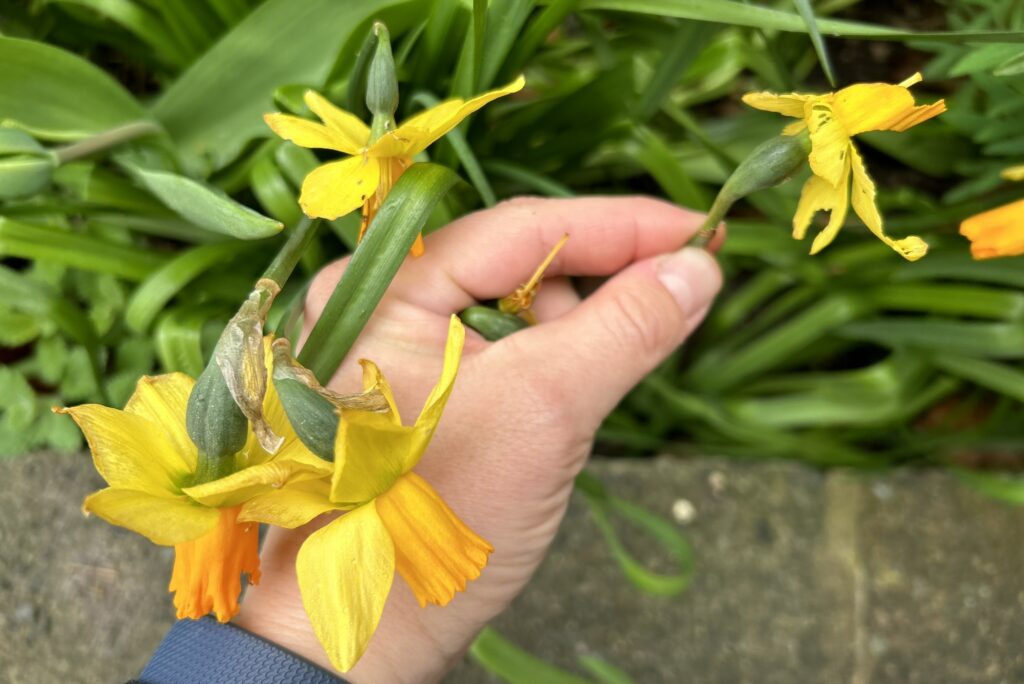
Don’t cut off or tie up the leaves, they need to be left to photosynthesise effectively to feed the bulb for next year. Once they have yellowed, you can tuck them under other plants and only when they have completely died back should you remove them. They will come away from the bulb without force and you’ll be left with a bulb ready to flower again next spring.
Bulbs can be left in the ground, but if they are in pots and you wish to move them to make way for new plants, take them out while their leaves are still fresh. Be careful not to damage the leaves or the bulb. Replant them in the earth and give them a good water and maybe even a feed. They should be planted at the same depth as they were in the pot.
If you have any crowded clumps of bulbs, you can lift and divide them now too. Use a garden fork to lift the clump from the ground, separate the clump into two (or more) sections and replant them where you’d like them to flower next year. Again, water them in well.
If you haven’t already pruned your hydrangeas, we suggest doing this early this month as they should be putting on some good new growth by now. Different hydrangeas need different treatment, and we detail what to do for each type here.
We have been seeing a lot of aphids around now, especially on roses. If you are too, please don’t be tempted to reach for the chemicals. Instead, you can pick off the aphids and squash them if they are causing damage to your plants. Hopefully birds and ladybirds will be attracted to your gardens to help manage the aphid numbers, along with hoverfly and lacewings (the larvae of which each aphids too). If the populations are large, you can spray them with a relatively strong hose. This will knock them off the plant, reducing the numbers you need to deal with by hand. If you do this, try to do it early in the morning so that the plant leaves aren’t left too damp overnight.
Once they have finished flowering, spring flowering shrubs such as choysia, ribes, japanese quince, forsythia, spiraea and philadelphus can be pruned. The flowering stems should be cut back to a new shoot, and the general size of the plant can be reduced if desired. Any rubbing stems should be dealt with, removing the one offering least to the plant, and you should check for any dead, damaged or diseased stems which should also then be removed.
With large, established plants, there may be some congestion and overcrowding in the shrub. To reduce this, remove a few of the oldest stems at ground level. This will promote new growth too.
Be careful that you don’t disturb any nesting birds. If you think there could be a nest in your shrub, leave it well alone. Pruning of hedgerows should be avoided until after nesting season.
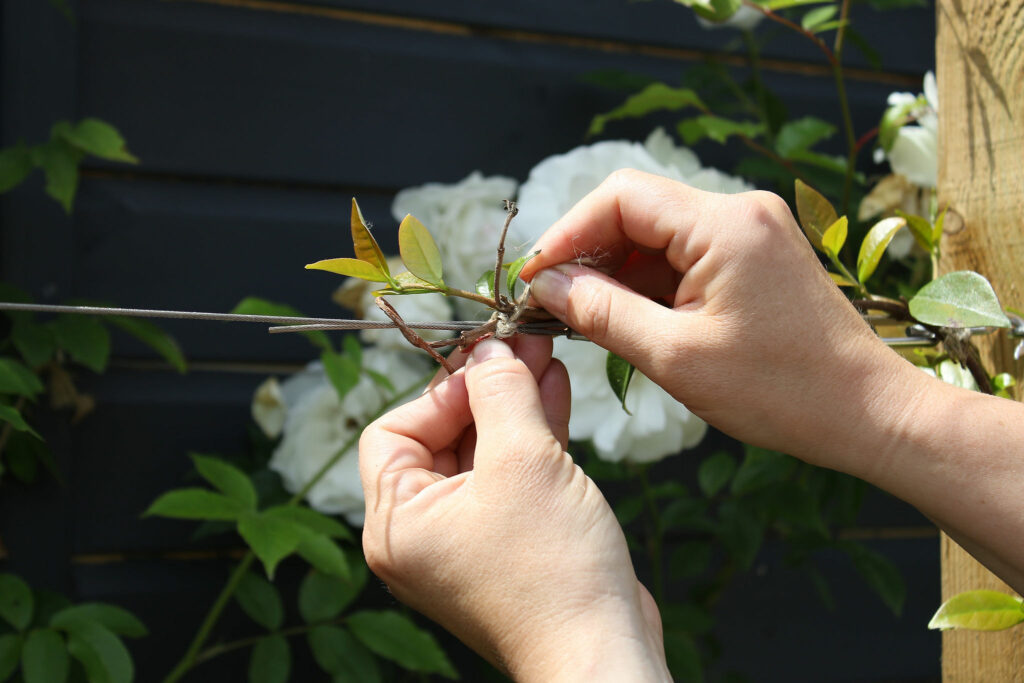
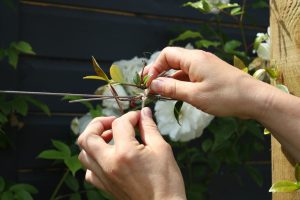
Clematis, jasmines, honeysuckle and climbing roses will all likely be growing well now and should all be tied in as new growth emerges. This supports the plant as well as allowing you to direct the growth. Use garden twine to gently tie the stems to their structure. If you are aiming to cover a flat wall, it is a good idea to fan the stems out to get an even spread across the wall. If you are covering a pergola or arch structure, we like to spiral the climbers around the uprights to get coverage all around the structure. Be patient and don’t pull on the stems, just gently tie them in so that they won’t move around too much in the wind and have enough support to grow in the intended direction.
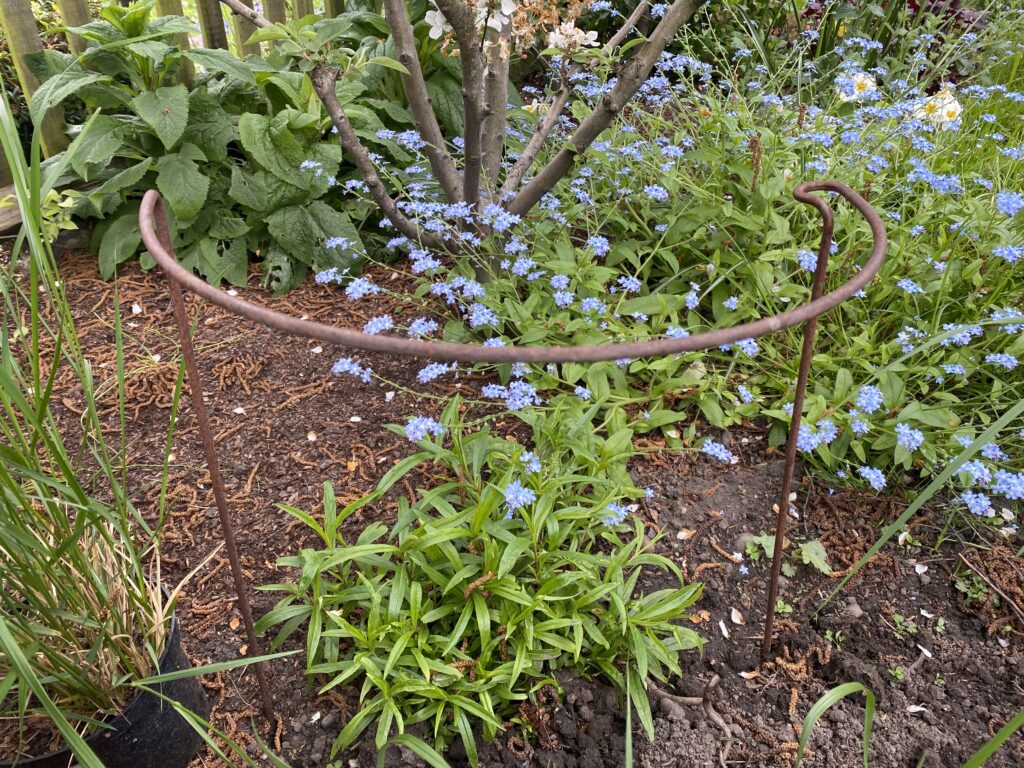
Many plants require some support when growing in herbaceous borders. Plants such as gaura, delphinium and penstemon will often benefit from a support. Before growth gets too large, it’s a good idea to get your supports in place. These could be half-moon hoops, metal grids or a homemade circle of bamboo or willow canes connected with twine. It’s far easier to place them now than when trying to get them under lots of foliage. In the image above, you can see a half moon hoop positioned ready for the penstemon to grow up through. The plant will lean forwards in to the hoop as it needs support due to the weight of the flowering stems. An additional hoop could be added at the back if needed, however in this instance we know the plant leans this way due to the aspect of its site.
Come mid to late May you can plant dahlias out into the ground. We suggest choosing pollinator-friendly varieties with open flowers. Dahlias are great additions if you like colour as they will flower from late summer until the first frosts. They are also great as cut flowers and bloom profusely so you will have a steady supply of colour as long as you keep cutting them and/or deadheading them. Some dahlias require staking so check this when you plant them and get the stakes in place before they are needed. It’s far easier that way around than trying to get a stake in once there’s lots of foliage to move out of the way.
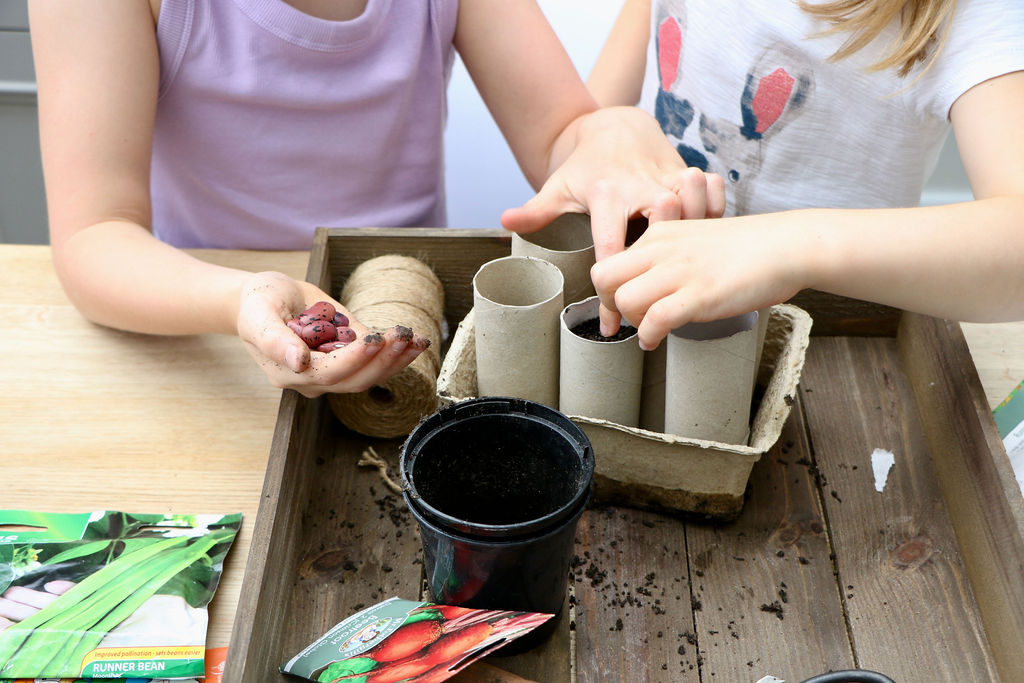
If you have any gaps in your borders that you’d like to fill for the summer months, you can do this cheaply with annuals such as cosmos or calendula. All you need is the pack of seeds, and they can be sown directly where they are to flower and will provide beautiful flowers this year.
Carrots, beetroot, radishes, cauliflower and purple sprouting broccoli can also be sown now and will crop this year, as will “cut and come again” lettuce. It’s lovely to pick fresh lettuce leaves from the garden as you need them. And they’re nice to look at too so work well in a little window box or at the base of a plant in a larger pot.
Lastly, there will likely be weeding to do. We always caveat this job with the reminder that weeds are just wildflowers, and most aren’t bad or damaging to have around. Weeds become a problem when they are outcompeting your intended plants for space and nutrients, or physically damaging them. For this reason, we always recommend removing bind weed which can quickly wrap around other plants and harm their growth, and we recommend removing weeds that are growing too close to, or in, other plants. Of course, if the look of weeds is spoiling your enjoyment of your borders or pots, they can be removed, but at the back of borders you might consider leaving some to flower as they are excellent for pollinators. You could even consider allowing an area of your garden to go wild if space allows.
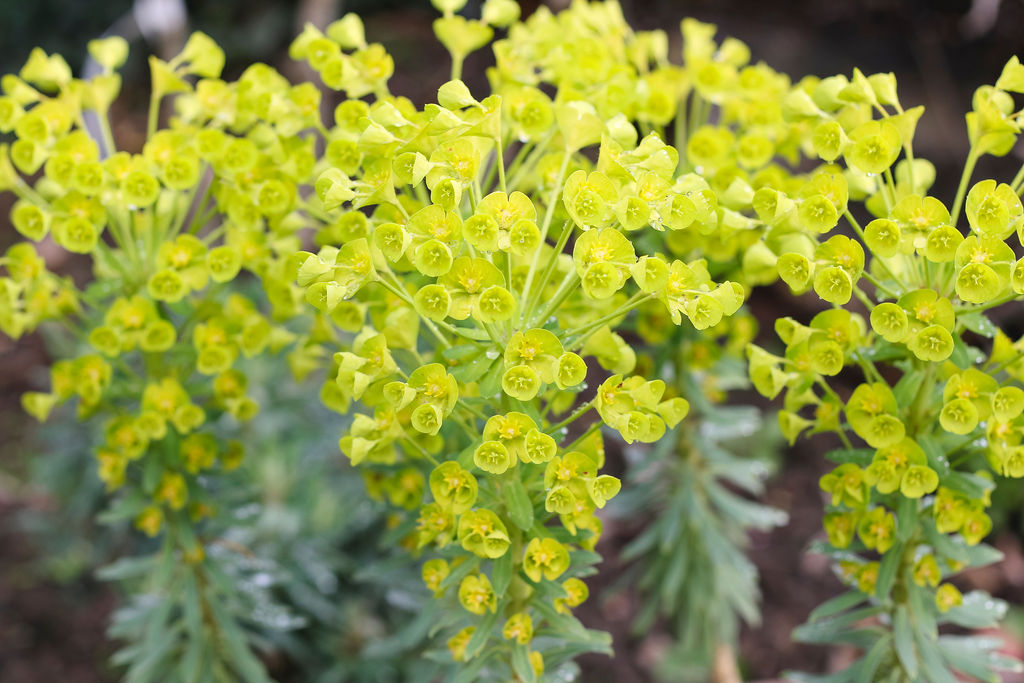
As ever with gardening, we have one foot in the now and one in the future. As Narcissi start to go over, remember to deadhead them so that all of the plant’s energy can go back into the bulb, rather than to producing seed. This will prepare for strong, healthy and floriferous bulbs next year. Don’t cut back the leaves after the flowers are over either. For the same reason as deadheading, these need to be allowed to die back naturally to feed the bulb for next year. If you find the sight of the browning leaves annoying as the month progresses, you can tuck them under other plants, and if you have them in pots, you can move the pots out of view.
Water your tulips and narcissi in dry periods (even if the flowers have gone over). This will help the foliage to grow well which in turn feeds the bulb and makes for better flowers next year. This is especially important for bulbs grown in pots as rainwater rarely reaches the soil in a pot. We suggest watering them once a week.
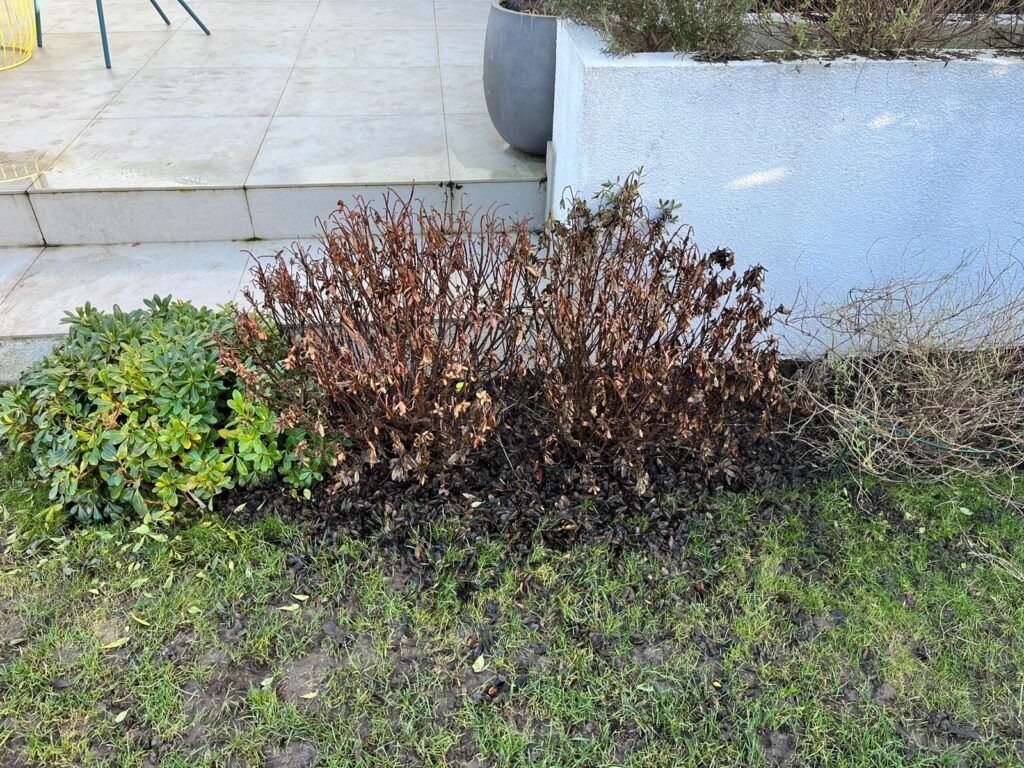
Following on from a particularly harsh winter, many shrubs have defoliated (lost their leaves) or died. In the gardens we care for, we are seeing this particularly with pittosporums and hebes. First up, you need to check if the plant is alive. You may be able to see some buds and new growth towards the middle of the plant by now. If this is there, you can cut the shrub back to this new growth. It will of course reduce its size somewhat but will give it the best chance of regaining a good shape.
If you can’t see any new growth, try cutting off a length of one of the stems to see if it has any green growth inside. If it is all brown and hollow, it’s likely the plant is dead. Check a few more stems to make sure. If it looks like the plant is definitely dead, dig it up carefully so as not to disturb the other plants around it. It’ll be important to consider carefully what to replace it with.
Next month we will be writing about hardy plants that should survive a winter like we have just had. Do look out for that and, if you haven’t already, sign up to our monthly newsletter to receive it straight to your inbox. If your shrub only has a section of defoliated or dead growth, it’s a good idea to prune this back, to stimulate regenerative growth. It may make for a less substantial plant now but the plant will be better off for it long term. We will be doing this with frost damaged ceanothus, as well as some pittosporums and hebes.
When we get a few dry days, it is a good time to give your lawn a mow. Do this on a longer setting than you might do a summer mow as this will help the grass re-establish after a tough winter. You can seed any bare patches. Next month we encourage you to take part in “No Mow May” either for all of your lawn or at least a part of it – it just involves leaving your lawn to grow for a month and seeing what wildflowers and other plants may be growing in it. This will be beneficial for wildlife and also can give you a taste of what having a wilder area of lawn might be like – as well as the break from needing to mow it! Why stop at May…..you could consider have a wilder and more beneficial lawn all summer – we have written here about creating wilder areas of lawn. Let us know if you have any questions!
This is a job to do towards the middle of the month once the risk of frost have definitely passed. Do check the forward forecast in your area before undertaking this prune. Once the risks have passed. Here is what to do for each plant:
Gaura – cut this back to the base where you can see the new growth coming. There will be new growth on the base of existing stems, and also new growth appearing from under the ground. Cut back all of last year’s growth to around 10cm from the ground.
Penstemon – in a similar way to the Gaura, these can be cut right back. You will see new growth along the existing stems but cut these back to just above the lowest ones. This will make for a much healthier and better shaped plant. It will feel a lot, especially if your penstemon hasn’t gone brown over winter, but this prune will stop the plant from becoming too woody and leggy.
Salvia – there are three main types of perennial salvias that you may have in your garden. Each one requires slightly different care.
Firstly, there are herbaceous perennial salvias which are hardy and come back year on year, in the right conditions. These include Salvia nemerosa such as the popular ‘Caradonna’, and Salvia x sylvestris such as ‘Mainacht’. These should be cut right to the base of the plant as all the new growth emerges from below the soil every spring.
Secondly, there are tender perennial salvias which include Salvia Amistad and Wendy’s Wish. These can come back year on year but might succumb to cold weather and/or soggy soil. These can be pruned as per the hardy herbaceous perennials if they’ve survived the winter. It has been a particularly cold winter so time will tell if they have survived.
Lastly there are shrubby salvias which are woody and hardy, some are evergreen or semi-evergreen. These are our favourite Salvia and include Salvia x jamensis (such as ‘Hot Lips’ and the rest of the ‘Lips’ series), Salvia greggii (such as ‘Icing Sugar’) and Salvia microphylla (such as ‘Trebah lilac white’). The aim with pruning of these plants is to create a well-shaped plant that doesn’t go leggy. Usually at around half way up the plant, sometimes more, sometimes less, you will see an abundance of new growth. You can cut back to here, cutting just above a pair of leaves. Remove any dead or damaged growth at the same time. Pruning like this will maintain the shape of the plant and ensure it flowers all over, rather than just at the ends of the stems.
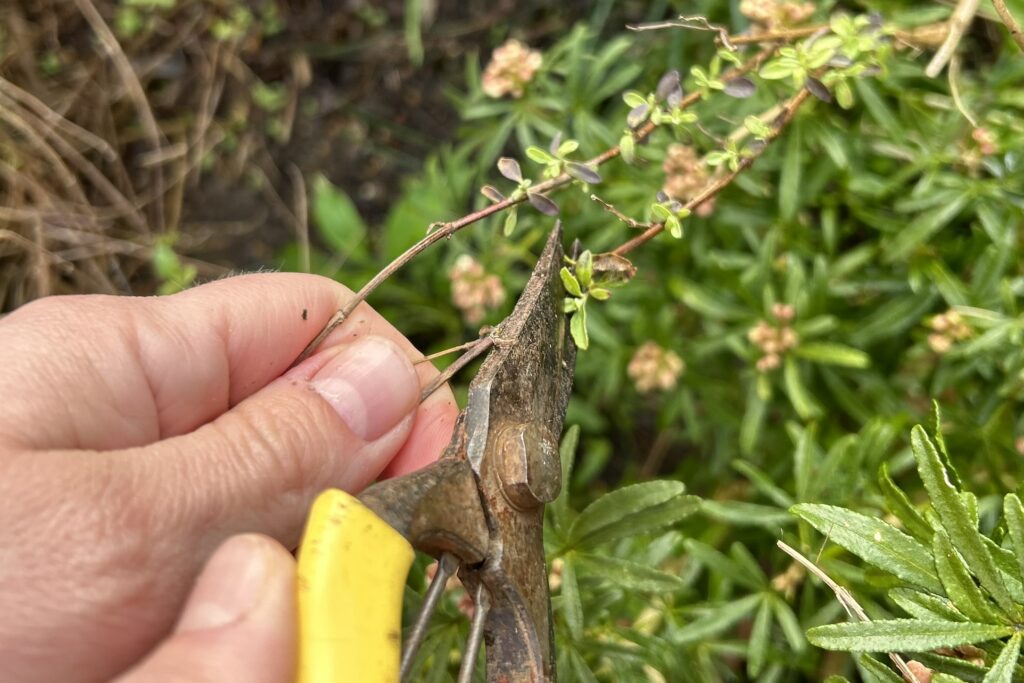
And if you haven’t yet cut back your other perennials such as Verbena, Nepeta, Erigeron, Sedum and more – do them now! Cut all of last year’s stems right down to the ground. Even if you can see new growth on last year’s Verbena stems, you will also see growth emerging from the ground and this is the growth that you want – so be brave and chop away!
Hydrangea should be safe to prune mid to late April as well – do check the forecast in your area before doing so in case of any cold snaps ahead. Different Hydrangeas require different pruning – here is a basic guide:
Paniculata varieties (such as Limelight and Snowball) and Arborescens varieties (such as Annabelle) –pruning these fairly hard will encourage better flowering for this year. It also keeps their size in check as some varieties can get up to 2.5×2.5m – if left to get to that size you probably won’t get the best view of the beautiful blooms! First remove any dead, damaged or crossing stems. You should then cut back all stems to a pair of healthy buds – either to a high bud if newly planted and you’re looking to grow a larger plant, or hard pruning to the lowest pair of healthy buds to create a low framework of branches and large flower panicles.
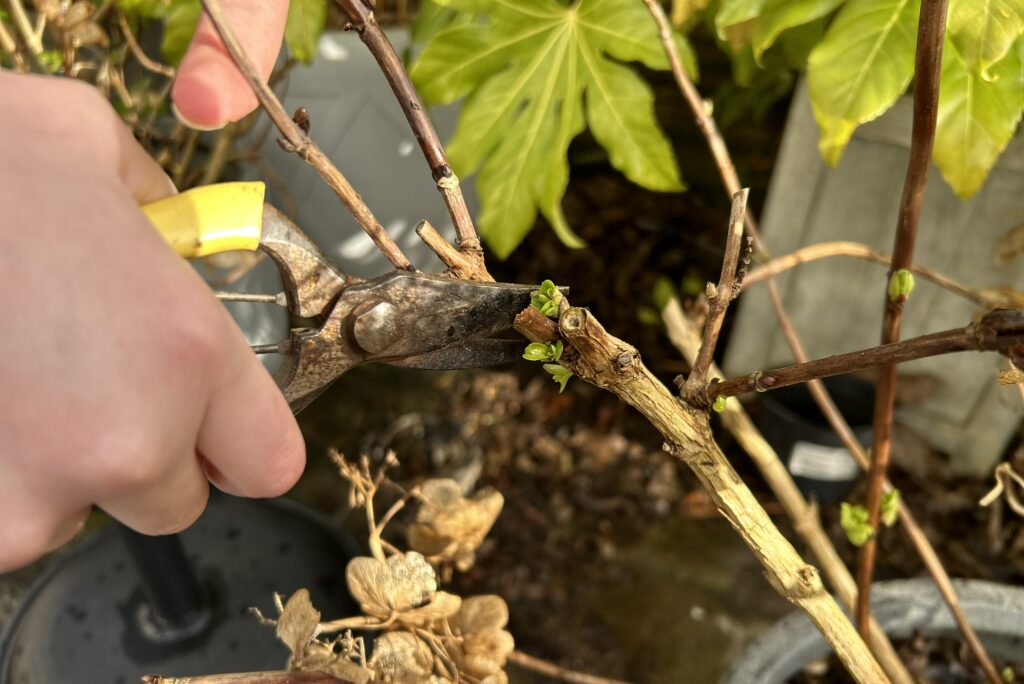
Mophead and lacecap varieties – with these it is more deadheading than full on pruning as they flower on last year’s growth. Again, remove any dead, damaged or crossing stems. With more mature plants, you may need to remove some of the oldest stems at the base, to create space and air within the plant. Deadhead the remaining stems by cutting just above the highest pair of buds, or possibly the one below that in order to keep all stems approximately the same length.
Now is also a good time to feed, water and mulch your Hydrangeas for an extra boost as they grow and develop their flower buds.
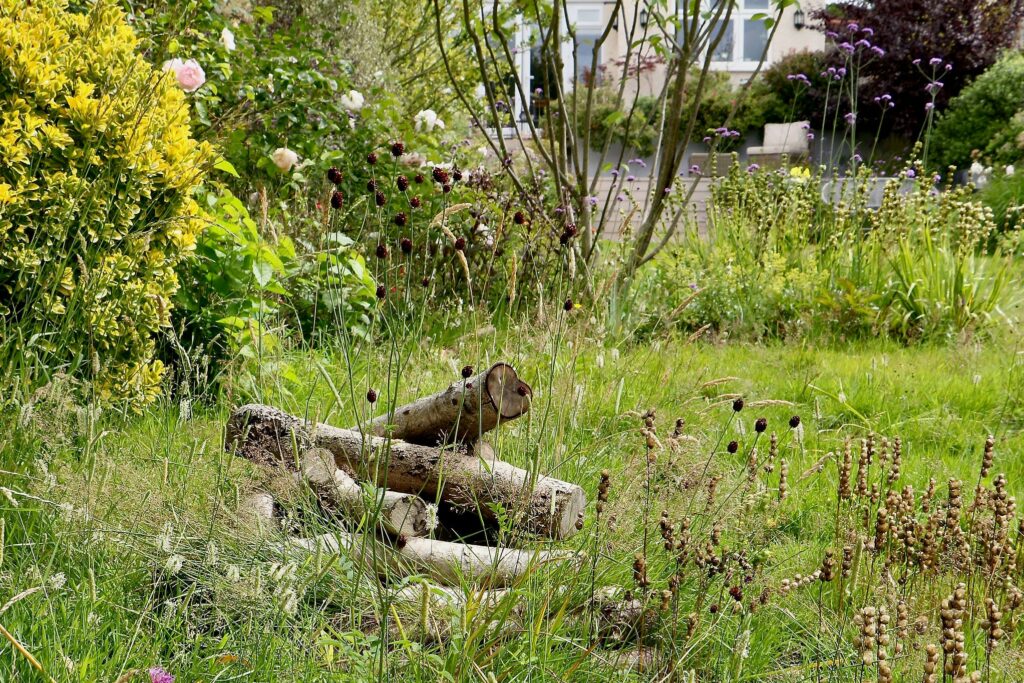
Spring cleaning often gets a grip at this time of year, not only in the house but the garden too. Tidying the garden readying it for increased use as the weather warms up is a lovely job and allows us to look forward to lots of happy times yet to be spent in the garden. However, don’t be tempted to remove all piles of fallen leaves, sticks or logs. These are essential habitats for wildlife and leaving some piles around the garden (perhaps at the back of borders so they are both out of sight and also away from disturbance) is really beneficial.
Early April is also a great time to install bird boxes and other habitats for wildlife. We have written about this in more detail here, including some fun ways to engage children with the garden.
All roses will benefit from being fed now, which will encourage healthier plant and better blooms this year. If you are on clay soil, which is very nutrient retentive, you can probably get away with just a thick layer or mulch, such as well rotten manure or homemade compost. If you are on ligjhter soil or want to give your roses an extra boost, choose either a general purpose or rose-specific organic feed (following the instructions on the pack), water in and then mulch the rose well, using garden compost or well-rotted manure. Remember not to mulch right up to the stems of the plant as this can lead to rot. If your rose is planted in the ground, this should be enough fertiliser for it until after the first flowers.
If your rose is in a container it will have much less access to nutrients, and so will benefit from being fed once a month from now until late Summer. Use a general-purpose organic fertiliser until the flowering starts, and then switch to a high potash fertiliser to help promote flowering – a tomato feed is usually a good option for this, or liquid seaweed.
With all fertilisers, we urge you to use organic whenever possible. This is far kinder to the plant and the environment.
New growth will likely be really getting going now on your perennials – including plants such as sedum, verbena bonariensis, geums, nepeta and hardy geraniums. Check that the new growth looks healthy and trim back any brown leaves. You should also check for weeds growing in or too close around the plant. These can restrict growth of your intended plant so should be carefully removed.
Garden favourites Convallaria majalis (Lily of the Valley) and Bearded Iris can be ordered and planted now as bare root plants. The roots will need soaking for a few hours before planting, but full instructions on how to plant should be provided by the seller.
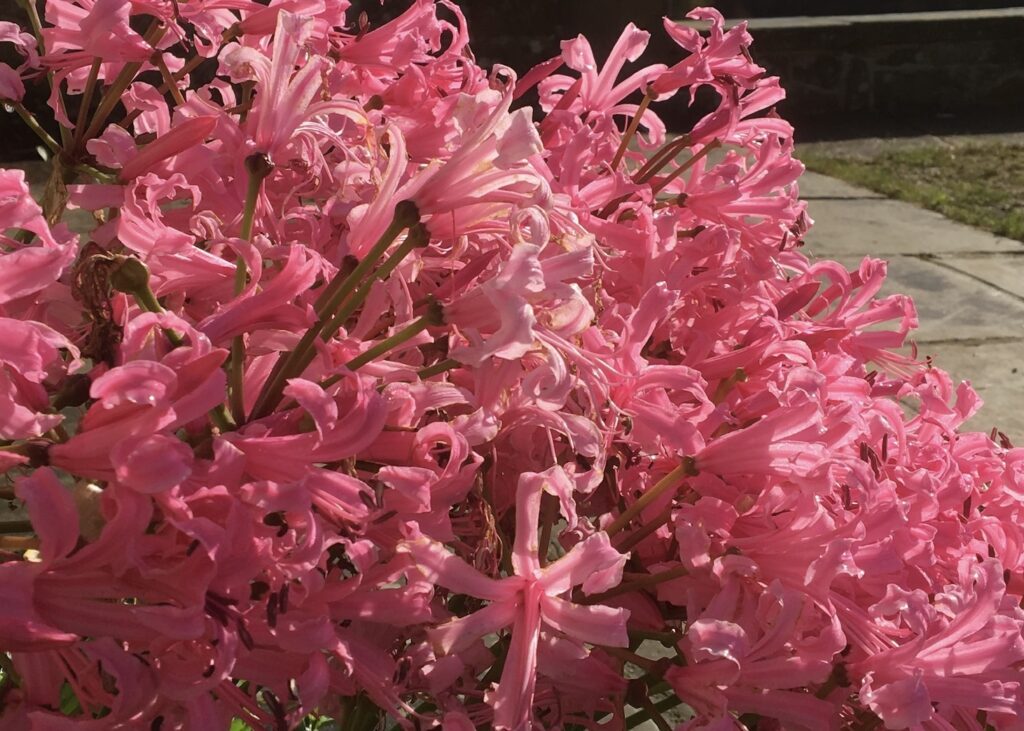
Summer flowering bulbs can be planted now too, our favourites of which are Nerines (pictures en masse below) and Gladiolus murielae (Abyssinian gladiolus).
Lastly, crocosmia corms can be planted now too. These can sometimes take a year to settle in and flower, but they are a beautiful addition to a garden. Some of our favourite varieties include George Davidson and Sunglow which are both a lighter orange/yellow colour but grow to different sizes, and Emily MacKenzie and Masoniorum which are richer orange colours. They’re great for bees, and when they turn to seed, they’re beautiful for added late autumn interest in the garden too.
Deciduous ornamental grasses such as Calamagrostis and Miscanthus can be cut back now before their new growth gets too tall. You want to wait until the risk of hard frosts is over, but before the new growth has got too tall. Last year’s growth which by now will be straw-like and dry can be cut back using secateurs or shears, cutting it down to about 15cm.
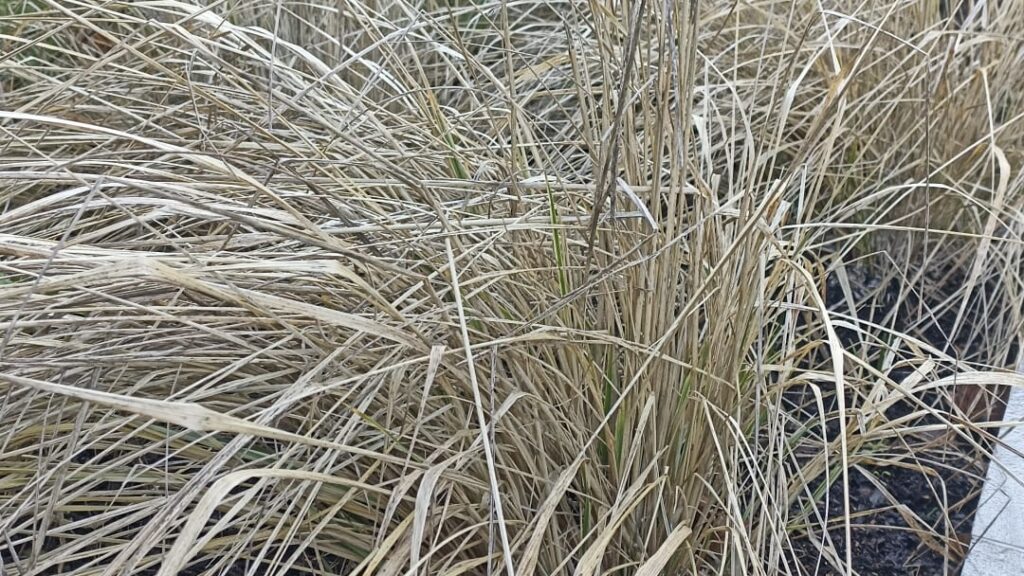
We have written about pruning and dividing ornamental grasses in more detail here, so do take a look if you have some in your garden. The right care now will make for a much healthier and good-looking plant in the coming months. If you have a compost heap, the cuttings can be added to that in place of other brown material (not green) as they are higher in carbon. Layer them between green clippings, or chop them up and leave them in a pile for birds to use for nest building.
Perennials that you have left the seed heads on over winter can also be cut back now to make way for new growth. Plants such as sedum, verbena, veronicastrum and phlomis. Cut these down to just above the new growth. Less hardy perennials such as penstemon, gaura and shrubby salvia should be left until the risk of frosts has passed – which could be as late as early April, even down here in the South.
If your ornamental grasses or perennials have become congested and didn’t flower as well as usual last year, or if they are well established and you just want to create some new plants for elsewhere in the garden – now is the time to divide/split them. This is not a scary as it seems and well worth the effort! We have written about how to do this in detail here.
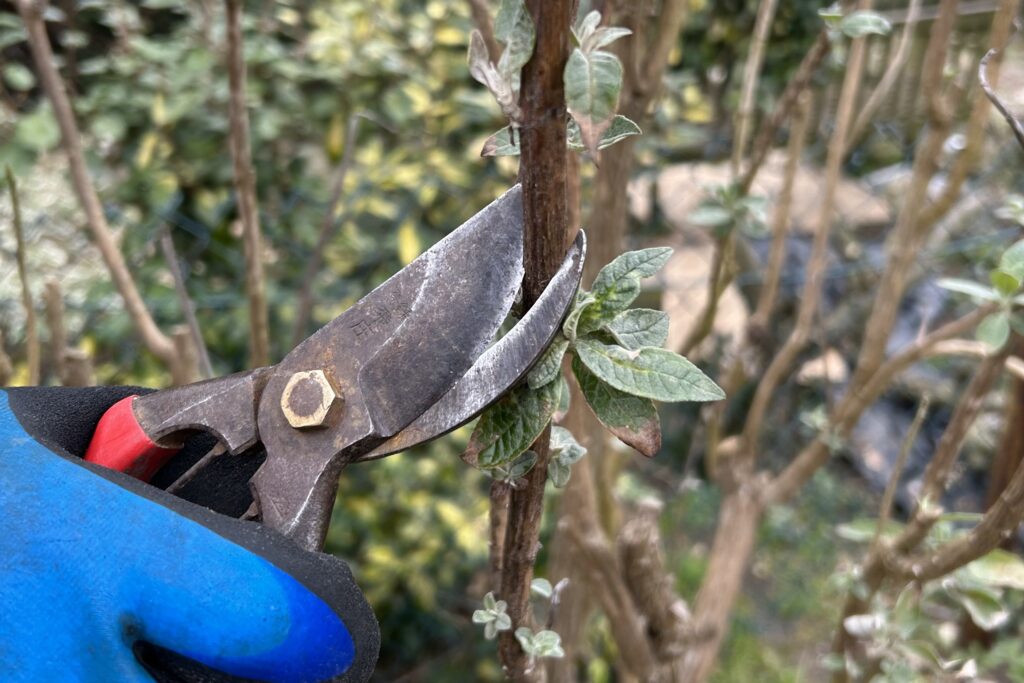
Most buddleia can be pruned from the start of the month here in the South. They will likely be showing new growth already but that doesn’t all need to be kept. They are hardy plants that can get tall very quickly so good pruning is really beneficial. It makes for a better shaped plant with flowers in sight rather than high above our eye lines. They are simple to prune, just cut all of the previous year’s growth down by between a third and two thirds, cutting just above a new bud of growth as shown here:
There are some less common varieties of buddleia which require different pruning. These include the varieties which flower on last year’s wood and the globosa variety. If you have a less common variety, do check its specific requirements so as not to impede flowering this year.
Even when it rains, pots will benefit from a weekly watering. Rainfall often fails to get into the soil in pots as the plants block it from reaching there so it’s important to not let them dry out. Use rainwater from a water butt if possible as it’s better for your plants (and of course saves on water!). Watering any pots with tulips in is especially important to avoid having short, stubby tulips. Just make sure the pots can drain so that they don’t get too soggy. This can be achieved by raising them on feet or having them on a permeable surface, and always using pots with drainage holes and crock or other drainage material in the bottom to prevent the holes getting blocked.
As the weather warms up, both annual and perennial weeds will be starting to grow. Removing the unwanted ones regularly will help you to keep on top of them and stop them impeding the growth of intended plants. We recommend checking around perennials for any seedlings which could block or compete with their new growth. If you aren’t sure whether the plant is a weed or a self-seeded flower or intended plant, wait a little until it develops more and you can identify it. As ever, we like to leave some ‘weeds’ (aka wildflowers!) as wild, native flowers are often really beneficial and excellent resources for pollinators, so if it’s not in anyone’s way, won’t impede growth or damage nearby plants, then you may well choose to leave it in place. We do, however, always recommend removing pernicious weeds which might destroy other plants, such as bindweed.
As herbaceous perennials are starting to grow, now is a good time to work out what needs supporting. Heavy flowers such as peonies and delphiniums and many roses often benefit from support. We also find that in newly planted gardens especially, where the planting is not yet dense enough to offer surrounding support, plants such as verbena bonariensis, gaura and penstemon may need a supporting structure. There are lots of options to choose from, ranging from bamboo or willow stakes, grids made from twine or metal hoops and grids. It’s worth spending some time now working out what supports you will need and getting them in place towards the end of the month, before too much growth is put on. Most plants will then grow up through the supports and they will become barely visible amongst the foliage.
As a minimum, mulch around newly planted trees and shrubs, but the whole garden will benefit if budget and time allow. It will help retain moisture in the soil and condition it, as well as inhibit weeds from growing. Homemade compost is a great option to use but it can be hard to make enough in suburban gardens to cover the whole garden so we use fine composted bark. Weed the ground before spreading a good 5cm across the soil. For the mulch to be effective it needs to be this deep so if you only have enough for a smaller section of garden, do a defined area properly rather than spreading it too thinly.
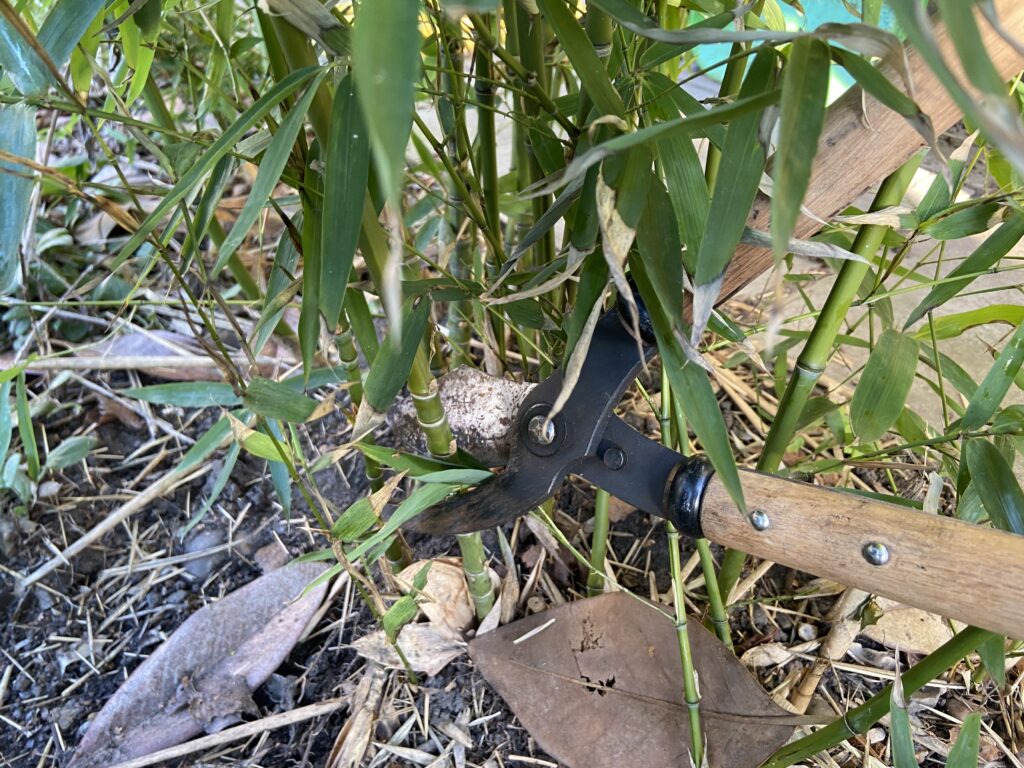
Rake up the fallen foliage around the base of the bamboos – this would take a very long time to decompose so is best removed. You can weed the area if necessary as well as removing some of the oldest stems to reduce congestion. Cut the canes down at the base of the plant using loppers. You can also reduce the height of the canes if they have become too tall. The cut-out canes can have the foliage removed and be used for stakes in the garden.
Ideally your roses would have been pruned by now, but if you haven’t had chance, it’s definitely better to do it now rather than not at all. We wrote in detail about how to prune roses in our February blog. We really recommend doing it as it will result in a much better display of flowers this year. Look what we have to look forward to!
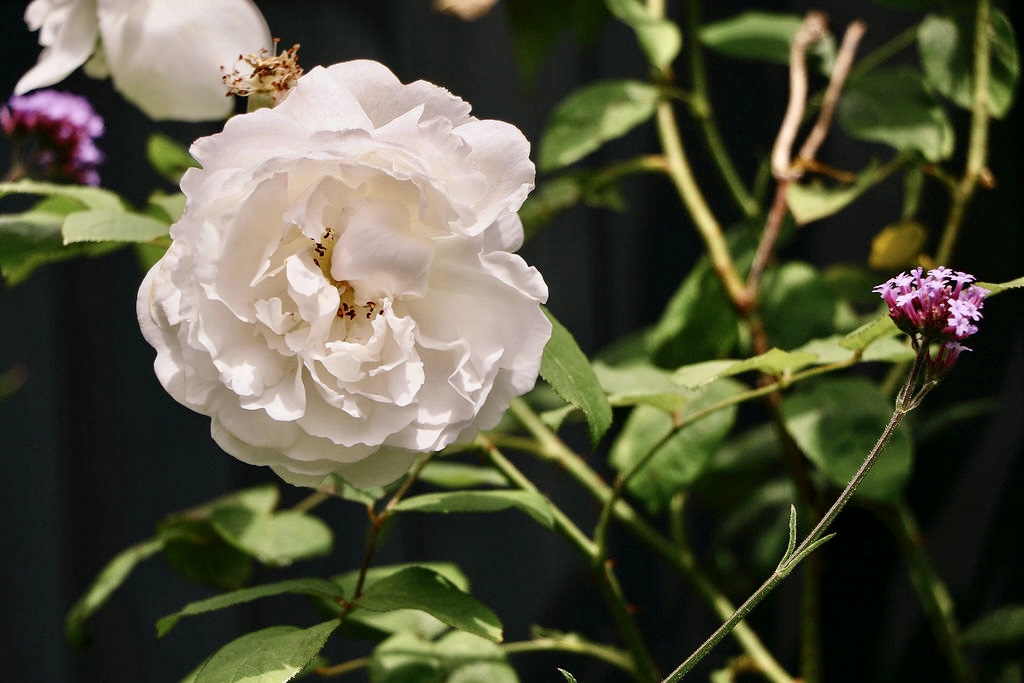
If you are wanting to add any new roses, trees or hedging to your garden, we are now nearing the end of bare root season. This is more cost effective and better for the environment too as pots and compost aren’t needed. The plants will come with their roots bare (as opposed to in a pot of earth). Simply soak the roots in water for an hour or so and then follow the planting instructions. If you’re looking for some inspiration for what rose to add to your garden, we have written about some of our favourites here.
More mature trees and shrubs will be rootballed – which means their roots and soil will be wrapped in hessian and wire. These should be planted as they come (hessian, wire and all!), just check for and cut back any wire which is tight around the base of the trunk. This keep the rootball happy and the hessian and ungalvanized wire will naturally degrade in the soil over time.
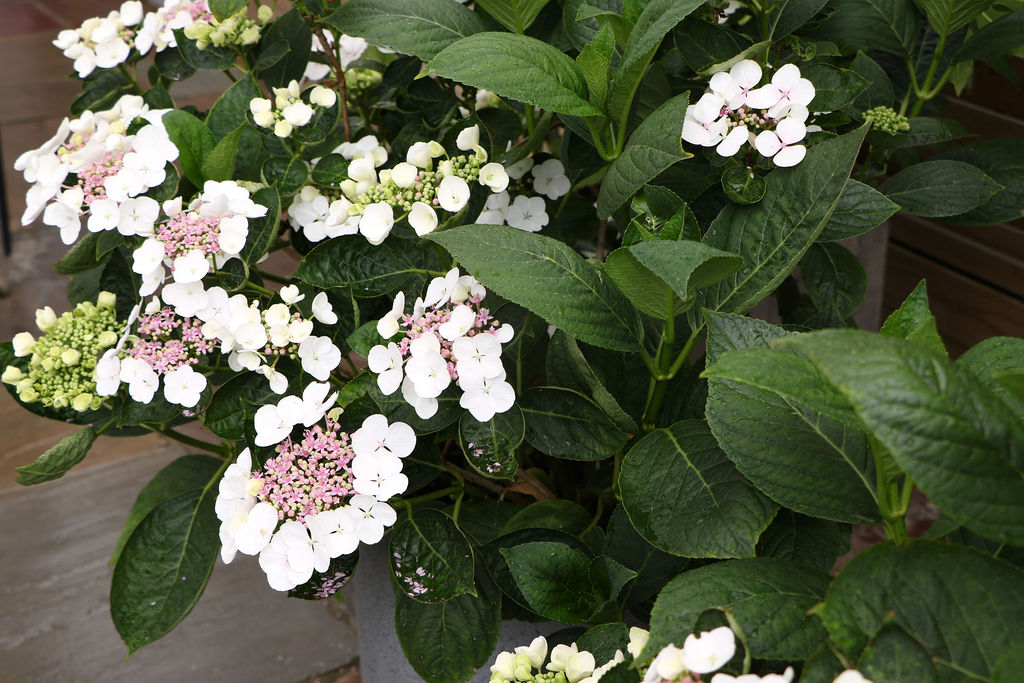
Mophead, lacecap and serrata hydrangeas can be pruned towards the end of the month, only once the risk of frost is over – do keep an eye on the weather forecasts for this and don’t be tempted to do it early. They don’t require a lot of pruning, just deadheading to the first pair healthy buds. If your plant is well established, you can cut one or two of the oldest stems out from the base of the plant. This will encourage new growth which should flower better.
Paniculata and Arborescens can be pruned towards the end of the month as well – again do check the weather forecast. They can be deadheaded back to the first pair of healthy buds, the same as the mopheads and lacecaps, or, if you want the plant to produce larger flower heads on stronger, more vertical branches, you can give them a harder prune. Cutting them back to around their lowest pair of healthy buds should achieve this. This type of pruning will result in a framework of stems around 25cm-60cm in height initially. Choose the height you prune to depending on how tall you want the plant to be once it grows this year. If you need a taller plant (for example to grow up behind some seating or to hide a wall), go for around 60cm in height, but if a slightly smaller plant works for you, go shorter and you will be rewarded with strong, healthy stems and a bounty of flowers.
Don’t prune climbing hydrangeas – they can be pruned after flowering in the summer.
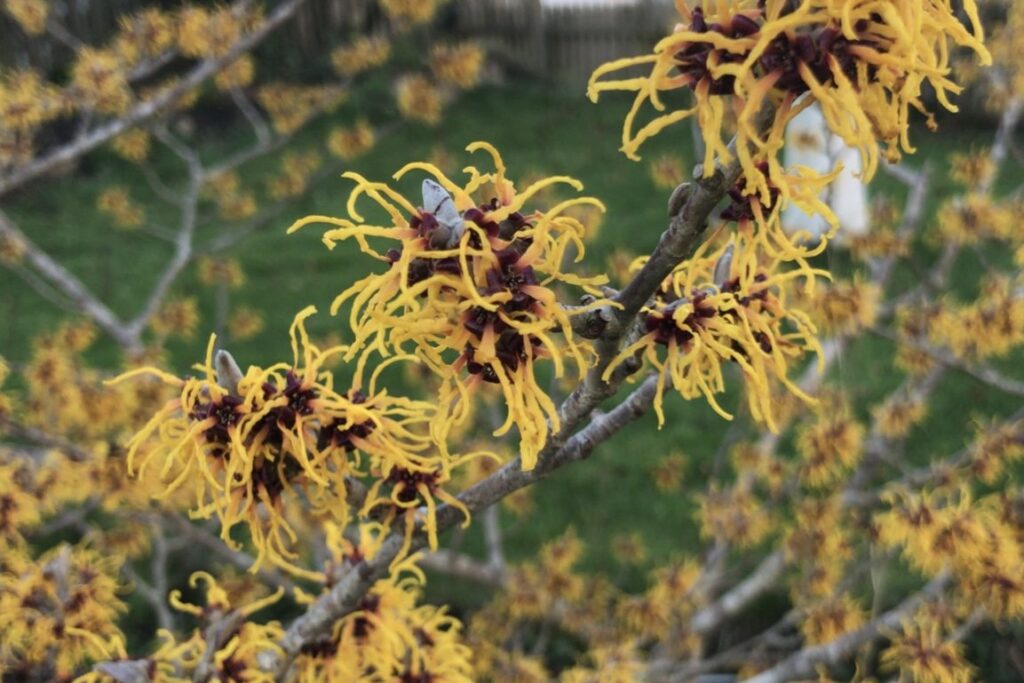
A good place to start! We’ve had a really cold winter and have seen lots of frost and snow damage in our garden care clients’ gardens. As tempting as is it to cut back browned or bare plants such as penstemon or shrubby salvia, it is really important to leave these until the weather warms up. We could easily have a another long spell of cold temperatures and recently pruned plants will be at a much greater risk of frost damage. Hydrangeas should also be left alone as the flower heads will help protect new growth too.
Many shrubs have been severely damaged by the snow and frosts, especially it seems Pittosporum and Hebes, many of which are looking really sad or have completely defoliated. We haven’t seen them suffering this much in the past and believe it could be due to the sudden change in temperatures from a fairly mild early December, to the extremes of sub zero temperatures and an extended period of snow and frosts. We strongly advise leaving all of the above shrubs and perennials alone until we reach consistently warmer temperatures, and with any luck they will start to regenerate come spring.
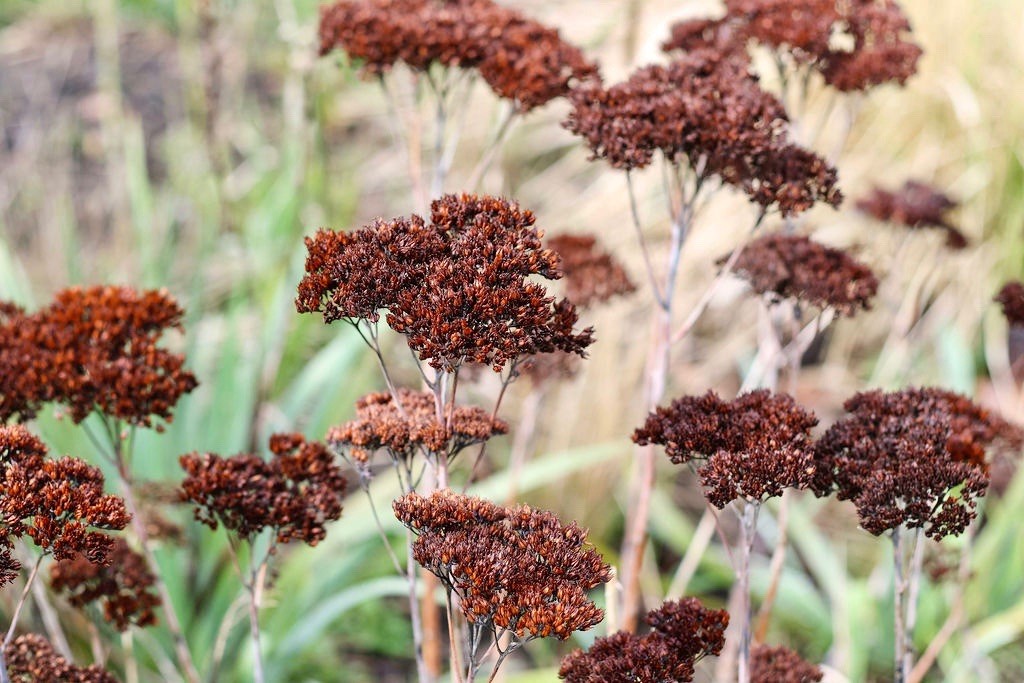
We also advise you not to cut back seed heads on plants such as Sedum or Verbena, unless they are collapsing. These are useful for invertebrates who shelter in their hollow stems, as well as adding some interest to the winter garden while we wait for the bulbs to really get going. Anything collapsing can of course be removed for plant health. You should also leaving deciduous grasses standing until the start of March, as it is too early to cut them back at the moment – and besides that they still look great!
Pruning wisteria should be one of the first jobs you do this month, if you haven’t done it already. It’s important to prune wisteria twice a year – once in Winter (January or February) and once in Summer (July or August). This will maintain its shape and size as well as ensuring beautiful flowering.
If your wisteria has been pruned in the summer, the winter prune is relatively straight forward. You just need to prune the growths to 2-3 buds. Remove any dead, damaged or diseased wood too.
If your wisteria has not been maintained for some time, it will likely need a harder prune now. The same aim applies: you want to be left with growths 2/3 buds in length coming from the main framework of the plant. You may have to untangle excess growth to reach this stage, tracing back branches to their source and unwinding them as you go, or even cut back sections of the plant to the base. This needs to be done when the plant is overcrowded and too large. Aim to be left with a balanced framework of relatively evenly spaced branches. Severe pruning can sometimes result in delayed flowering, either later than usual that year, or not flowering that year. It will be worth it long term though.
Hellebores will be flowering now and they are a beautiful source of very early nectar. If you haven’t already done so, cut back the previous year’s leaves so they don’t cover the flowers, and to help reduce the chances of spreading hellebore leaf spot disease.
In the South, roses can be pruned in late January or February. Firstly, as with all pruning, make sure your loppers and secateurs are clean and sharp. This will allow for precise, clean cuts to be made and not introduce any diseases to the plant. It’s essential to prune roses to ensure they flower well. Without pruning, they can become leggy, woody looking shrubs or gangly climbers with scare flowers. The only exception to this rule is rambling roses which only need pruning if you want to reduce their size.
If a rose is in its first year, only a light prune is needed. Cut back stems by 3-5 inches, and any disproportionally long stems back to match the rest of the plant. Cut at an angle and above a node on the outside of the stem.
If the rose is in its second year, cut it back by around a third, again bringing any disproportionately long stems back in line with the rest of the plant. From the third year onwards, cut the rose back by a half if you want to reduce its size, by a third to maintain its size and by less than that if you want it to grow larger.
Always remove any weak stems as they won’t be strong enough to hold flowers. With older roses, you will also want to remove any crossing stems that will look congested when in leaf and flower. Look at the plant and make a judgement on which stem will provide the best overall shape and appearance, and remove the other one.
The key to a really successful climbing rose is to have a secure frame work for it to be tied in to. This can be a decorative framework such as an obelisk, archway or pergola, or a structural one such as a fence or wall. Wires need to be attached securely to the structure for the rose to be tied to, if it can’t be tied to the structure itself. We space wires on walls at 2ft intervals horizontally. While pruning your climbers, check their supports are sturdy.
If your rose is in its first year, a light prune will suffice. Remove dead, damaged or diseased stems as well as any that can’t be tied in. Evenly fan out the remaining stems as best you can, trying to get them to at least 45 degrees and tie them in to their supports with garden twine. Having the stems like this encourages shoots to grow along the stem which will result in a fuller looking rose with more flowers.
If your climber is two years old or more, repeat the exact same process as above but also cut back flowering stems to around 6 inches from the main stem. Any weak stems should be cut back to the base of the plant too, as they won’t be strong enough to support the flowers later in the season.
With all roses, remove any remaining leaves so as to reduce the chance of passing on disease spores to new growth. All fallen leaves should be cleared away and removed from your garden. Don’t add them to compost heaps as they may carry disease spores. Check your roses are secure in the ground and not rocking around in the earth. If they are, add some more soil or compost to steady them and tread the ground in around them. This should prevent any further rocking (known as wind rock) which can really damage growth.
Fig trees need pruning when the tree is dormant at the end of winter. For us here in the South, that’s now – a long, hard frost is unlikely and the days are starting to warm up. The aim for a fig tree is to create an open, goblet shaped head. You want to remove any dead, damaged and diseased stems, and any that are crossing or rubbing on other stems. Use a pruning saw to cut them back to as near the base of the plant as you can. If your tree is older and hasn’t been managed for a while, you can also remove the oldest one or two stems at the base to help open up the shape and to promote new fruiting growth for the following year. If you want to reduce its size, in addition to the above, you should prune all branches back by about a third. This will result in no or few fruits this year but be worth it in the long run.
It’s important to know what group your clematis is in. If you know what you have, check its group. If you don’t know, a rough rule of thumb is clematis that flowers with quite large flowers in May/June is group 2, and those that flower after mid-June and later are group 3.
Group 2 clematis should be pruned now. Find the end of each stem and cut it back to the first pair of healthy buds. You are leaving the old growth as it is because the flowering stems grow from it. The exception to this if it is a newly planted, young plant. If it doesn’t have three or four healthy stems growing from the base then it should be pruned to about 30cm from the ground, just above a pair of healthy leaf buds. This will encourage more stems to grow giving you a fuller, bigger plant.
Group 3 clematis should be pruned back to about 30cm from the ground however old the plant is. you need to leave at least two pairs of healthy buds and cut above these. This type of clematis will grow back quickly and flower on the new Spring growth.
Now is a great time to mulch. It will help inhibit the growth of both perennial and annual weeds as well as help retain moisture in the soil and condition it. Homemade compost is a great option to use but it can be hard to make enough in suburban gardens to cover the whole garden so we use fine composted bark. Weed the ground before spreading a good 2 inches across the soil. For the mulch to be effective it needs to be this deep so if you only have enough for a smaller section of garden, do that bit properly rather than spreading it thinly.
Bulbs such as snowdrops and native bluebells are best planted “in the green” (meaning when they have grown, rather than the bulb on its own). Order yours now so that you can enjoy them next year.
If you have any shrubs you would like to move, now is a good time to do so (unless they are currently in flower). Bet sure to dig out as many of the roots as possible. Water the plant in well once it is in its new position, even if it rains. It will need to be watered regularly until it establishes in its new site.
Now is not the time for a big prune of roses, but it’s an important time to reduce any unbalanced growth or long shoots that have been sent out. This is to help reduce the likelihood of wind rock which is where the root system is damaged by the plant rocking around in the ground. Simply cut back stems in line with the rest of the plant. Cut on an angle so that water will run off the stem. This is all the roses will need now until their proper prune next year. If you have a rose that produces hips, be sure to leave these on both for their beauty and to feed the birds. If you have climbing roses, be sure to make sure they are tied in well to sturdy supports. Again, this is to prevent wind rock and also damage to individual stems by the wind and heavy rain.
Now is the perfect time to plant roses, including bare root roses which are, as the name suggests, roses supplied unpotted and without any soil. They are more cost effective than potted roses and will take just as well, still flowering in their first year. It’s also a more sustainable way of buying roses as no plastic pot or soil is used, and they are lighter for transportation, so a great option to consider. Bare root roses are usually supplied from november until the spring, whilst the plants are dormant. They need to be planted as soon as possible after arrival, and following the growers’ planting instructions. We’ve written about some of our favourite roses here to help you narrow down which ones you may like to add to your garden.
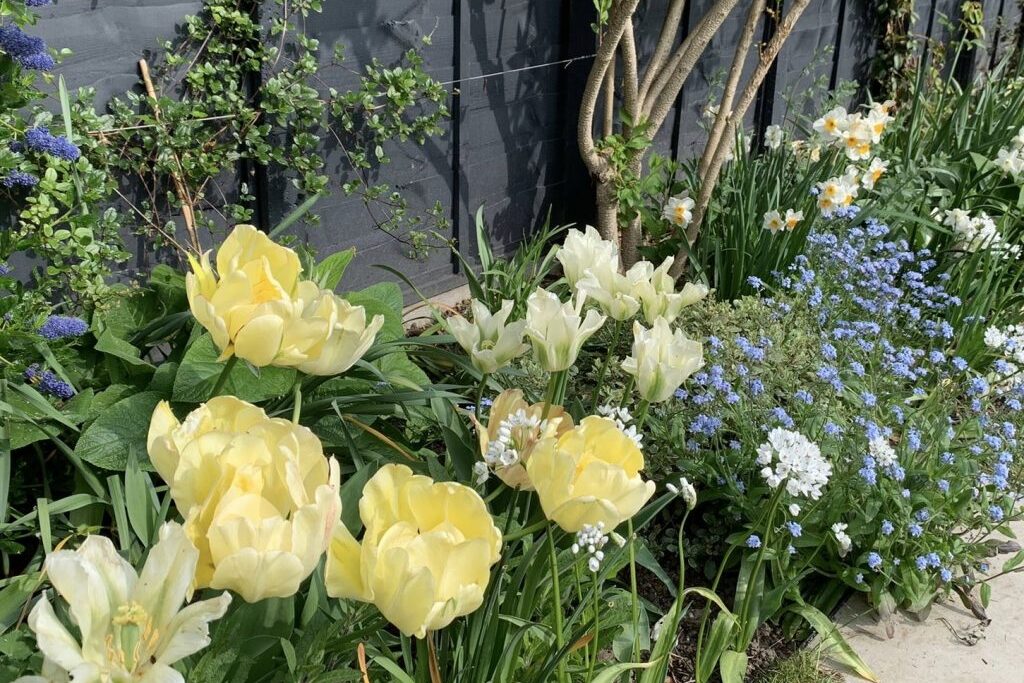
You can plant tulips any time from now until Christmas. We recommend following the supplier’s guidance on planting but as a rule of thumb, they do well planted deeply and in well drained soil.
It’s worth noting that tulips are not reliably perennial. To ensure you have a good stock of tulips every year, it’s prudent to add more each year. This is obviously budget and time permitting! Some varieties are said to be more reliably perennial than others, so if you haven’t already bought your bulbs, you may wish to check this too.
While talking about bulbs, it’s not too late to plant other spring flowering bulbs now, including crocus, narcissus, allium and fritillaria. You can find some inspiration for what bulbs to choose here, if you haven’t chosen yours yet.
As more and more leaves fall from our deciduous trees, it’s a great idea to continue raking them up to make leafmould. We wrote in our october blog about how to do this, which you can find here. It is free plant food for the future so absolutely worth the effort!
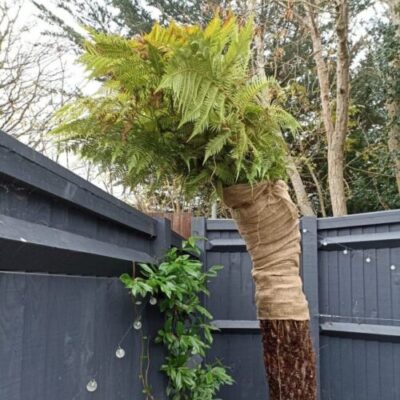
Tree ferns (Dicksonia antartica) aren’t completely hardy so it’s essential to protect them over winter. It is the crown of the plant, where the leaves grow out from, that can be damaged by frost and so it is here that needs protecting. We pack straw into the crown to insulate it and to absorb any water that does get through, and then wrap the top 20cm or so of the stem and base of the leaves near the crown in horticultural fleece or hessian tied with twine. The leaves will die back over time, but don’t need to be pruned until after the last frosts.
Now until early spring is a good time to plant deciduous trees, hedges and shrubs. This is because they are dormant so the process of being planted will be less disruptive for them at this time. As with the roses mentioned earlier, many can be bought as bare root specimens currently, which can be a more cost-effective way of adding structure and height to your garden as well as generally being more sustainable and often better for the plants.
Plants should be put into well prepared ground, and watered in well, even if rain is forecast. They will need watering 2-3 times a week and should then settle in well over winter ready to put on new growth come spring. In order to prepare your ground, make sure you dig holes wider and slightly deeper than the plant’s roots. Then fill in the hole a bit so that the top of the root ball sits at the same level as the soil around it. The reason you dig the hole a little deeper than you need and then fill it in again is to avoid the plant sitting on densely packed soil. This will make it easier for the roots to grow. Once you have got the level right, place the plant in the hole and fill it in with soil, firming as you go. It’s important to get the level right, with the stem clear of the soil but all roots under it. It’s better to be too high in the ground when first planted than too low. There will be some settlement of the soil after planting and you don’t want water (or soil) to pool around the stem of the specimen which can cause both rot and drowning of the plant.
The trees are well into their colour changing and there’s a chill in the air we’ve not felt for a while. It’s definitely october! One of the most beautiful times of year and a time for several rather important jobs in the garden…
As the leaves begin to fall, you can start collecting them to make leafmould. You will need a simple cage container for the leaves – just four stakes for the corners and chicken wire between them as the walls. Around 1m2 is a good size to start with, but you may wish to create a larger cage if you have lots of fallen leaves in your garden.
To make the leafmould, simply rake the leaves and put them into the storage cage. You can chop the leaves up to reduce their volume so that you can fit more in, and this will speed up their breakdown too. Within a year or so you will have high quality organic matter to use in the garden for improving soil, mulching or as a seed compost. If you create your cage on earth, be sure to lay a thick layer of card or membrane at the bottom to suppress any growth coming up into the leafmould. You could even reuse spent compost bags for this.
If you don’t have space for a leafmould cage, or you don’t have many leaves, you can also use a hessian sack, or an old compost bag (or similar) with holes punched in to store the leaves. Prepare the leaves in exactly the same way, dampen the leaves if they are dry and then tie the top loosely. Hang up the sack in a shed or garage, or stack out of sight.
Do be sure however to leave some piles of leaves at the backs of borders and under hedges, as well as stacks of logs and branches to provide habitats for insects, frogs, toads and hedgehogs over winter. These are essential habitats to maintain.
Also, beware of diseased leaves. If you have any plants with fungal diseases (often characterised by spots on the leaves) gather and dispose of the diseased leaves – do not use them to make leafmould as the diseases will survive. Some examples of diseased leaves commonly found in gardens but to avoid using in any sort of compost production are roses with blackspot or hawthorns with leaf spot.
Lastly, not all leaves are equal when it comes to making leafmould. Evergreens and conifers are best added to compost heaps as they will take a long time to break down. Thicker deciduous leaves such as sycamore or horse chestnut are best chopped up or shredded first to speed up their breakdown. Beech, hornbeam and oak are said to be the quickest to break down and make for a very good quality leafmould.
You can start to prune climbing roses from now until late-winter. Now is a good time to check you have enough supports in place for the climbers to be tied to, and to tie in any long whippy branches (if you are not pruning now) to prevent them being damaged by strong winds or heavy rainfall.
Pruning is best done once the leaves have fallen as it will be easier to see what you are dealing with. Any diseased or damaged stems should be removed, as should any crossing stems which will rub together and potentially cause damage to the plant. The main stems should be spread out in an open fan shape and tied in, keeping the side stems as horizontal as possible as this will promote the best growth of flowering shoots next year. The remaining side shoots can be trimmed back to two leaves/nodes.
Check your climbers for any broken or damaged stems. Remove these as this is where disease or rot can set in. Make sure they are well tied in to sturdy supports. This is to provide support to them as we enter the windier months where they could get damaged if they are blown around too much. This will also be good preparation for when they are ready to put on new growth in the spring.
If you are planning to add any new trees, shrubs, hedges or perennials to your garden, now is a great time of year to do this. The ground is still warm but it is also damp which is ideal for new plants to establish in. If you are looking for inspiration, we have written about some of our favourite plants for autumn here.
Now is also a good time to move any existing plants, for the exact same reason that conditions are favourable for plants to establish in new homes. If you are digging plants up to move them, a good rule of thumb is to start digging at the width of the plant visible above the ground, as the rootball will likely be similar or smaller. Try to damage the roots as little as possible by gently digging around them to loosen them in the soil, rather than rocking the plant around too much to break them. There will obviously need to be some disturbance in order to remove the plant, but this is a job best not rushed.
Whether you are planting a new plant or a plant you have moved within your garden, be sure to water it in well (even if it’s due to rain) and water it weekly until we have a decent amount of rainfall. This will give it the best chance of establishing in the new position.
If you have any herbaceous perennials that are getting a bit overcrowded, or too large for their space, now is the time to divide them. Dividing herbaceous perennials such as rudbeckia, hardy geraniums, geums and ornamental grasses shouldn’t be done in the first few years of planting but once every 3 or so years once established. Lift the plant, then use either a garden fork to divide it or two spades back to back for more mature root balls. Voila you now have two plants! You can split these again if they are big enough. This is a great way of getting new plants for free and making sure the plants you have don’t get overcrowded and remain looking their best.
Some perennials will be dying back towards the end of the month and can be cut back and mulched. With the weather still being quite mild this job may become a november one, but it’s worth keeping an eye out. Plants that can be cut back once they have started to fade include nepeta and hardy geraniums – really just those moundy plants which could become a soggy mess over winter. Other plants with taller, more structural stems can be left for winter interest – such as verbena bonariensis, echinacea, sedum, ornamental grasses and phlomis. It’s much more interesting to look at these stems than bare ground, and they provide food for birds and/or shelter for insects over winter. They can be cut down to the ground in early spring once the new growth starts emerging.
Plants with sturdy seed heads, such as this sedum, are great to leave for winter interest
Penstemons and salvias should be left until spring as this year’s growth will protect the crown of the plant over winter. Note that some salvias aren’t hardy and so if you haven’t already taken cuttings you could still try this now (look for new shoots, without flowers) in case they don’t survive the winter. Or you can always lift and pot them to keep them in a greenhouse or other sheltered spot over winter.
If you have garden pots, it is sensible to raise these off the ground now so that they don’t sit wet if we have a lot of rainfall. You can buy pot feet (both ornamental ones or invisible ones) or use something like bricks to lift them off the floor and allow for water to run through them.
Lawn growth will be slowing so now is a good time to tidy up the lawn. Please note however that it is better for it to be a little on the long side than cut super short! We suggest mowing your lawn on a medium setting as well as aerating it. You can aerate your lawn using a garden fork and pricking it at regular intervals. You can also buy a special tool or shoes to do this too if you so choose. Aerating the lawn will help with compaction and allow nutrition and water to reach lower down.
Now is also probably the last chance before spring to sow grass seed to cover any patches on your lawns.
We hope you get to enjoy doing some of these jobs over the coming weeks!
September is here and with it autumn, and of course finally some much needed rain! It’s amazing how so many plants bounced back so quickly with the downpours earlier in the month – colours are much more vivid again, both the greens of trees, shrubs and grasses and the various colours of flowers. There are of course some plants which are not recovering as well – read on for our advice on these.
Growth in the garden is certainly slowing but we’re enjoying the colours of late summer/early autumn and making the most of being outdoors while it’s still warm enough to sit out without a coat!
Here are some jobs to keep on top of this month.
To start with there are the regularly needed jobs of selected weeding, deadheading and tying in climbers. Weeding selected plants out on a regular basis will stop any unwanted plants from crowding out your intended beauties. We’ve seen a lot of bindweed recently curling itself around plants. Be sure to remove as much of weed roots as possible to help keep this invasive plant at bay for longer.
Deadheading will encourage some plants to keep flowering well into autumn – including penstemon, dahlia, delphinium, some salvias and repeat flowering roses. One exception is roses that produce hips – it’s best to leave the faded blooms on these so that they go on to form hips which will give you winter interest and provide food for birds in the colder months. Did you know that rose hips are high in Vitamin C and were collected during WWII to make a syrup for children?
You can also cut back any messy looking spent plants that won’t provide any interest over autumn or winter, such as some geraniums which may now be starting to die back and collapsing over other plants. If you have grown any sunflowers, you can leave the flower heads on these to provide seeds for the birds. The same goes for verbena bonariensis, the seeds of which are often enjoyed by finches all through the colder months, and many other perennials. Our motto is – if it’s standing upright and has a seedhead, leave it for interest and wildlife!
Keep checking and tying in your climbers as lots of them have had a sudden growth spurt this month! Doing this now and throughout the rest of the autumn will ensure they are well secured for any wild and windy weather we get in the coming months.
As the weather cools, and assuming that we continue to get rain and the ground remains damp, you can move shrubs that you wish to reposition. Be sure to dig them up carefully, with as big a rootball as possible, to minimise damage to the roots and stress for the plant. A rule of thumb often used is to dig a hole the same diameter as the plant itself which can help to avoid cutting in to any roots. Once repositioned, be sure to water the shrub regularly to give it the best chance of establishing in its new spot.
This month is a good time to give hedges and bushy shrubs such as pittosporum and taxus their final trim of the year. Using shears, reshape and tidy up the appearance of the shrubs and remove any diseased or damaged stems that you see. Hebes can also be given a prune. Take no more than a ⅓ off their foliage to help maintain a good bushy shape and keep them from becoming too leggy, don’t cut into bare stems though. If you don’t get round to this by mid October it would be best to wait until the spring.
While we have had a little bit of rainfall this month, we are still very much in a drought so pay close attention to how the plants in your garden are faring. Anything that looks to be thirsty should be watered with a watering can, ideally with collected rainwater or grey water.
If you don’t have water butts, or in addition to them, it’s a good idea to leave out buckets/other containers when rain is forecast, to collect the water to then be used for any potted plants. Remember that rainfall often doesn’t reach container grown plants as the plants themselves shelter the soil from getting wet. Make sure you water directly into the pot, rather than on top of the plant.
Bulb planting can commence this month! If you are planning on planting a lot of bulbs there are some excellent drill attachments that you can buy which significantly speed up the process so do take a look online at what’s available. Remember tulips shouldn’t be planted until November, and also that whilst you can start your bulb planting now, many of the bulbs will be fine if stored in a dry, cool place to be planted anytime between now and mid December.
When deciding where to plant your bulbs you can think about whether you’d like them to be woven through your planting beds, or planted in clumps. We like planting Daffodils in multiple groups of 7-10, as each group will fill a nice space at a time when your perennials are not present. With later flowering bulbs such as Camassia and Alliums we like them woven through the beds, dotted through your perennials – many of which will be emerging and even flowering by the time the bulbs are in flower. You should also consider the time of flowering, plant height and colour. We have a blog on some of our favourite bulb combinations here which should provide some ideas for you.
Mild case of powdery mildew
We have seen quite a bit of powdery mildew this year, largely we expect due to the drought. If you have any affected plants you can try following this advice to reduce the likelihood of it coming back severely next year.
We hope these tips help you to enjoy nurturing your garden this month. If you have any questions or comments please do let us know below. See you in October!
Here we are in August and what an incredibly hot and dry summer it has been so far. Frequent watering has been essential, not just for newly planted gardens and your containers. But with hose pipe bans coming into force, we now have to think very carefully about what we water and how. See our tips below. We have kept this month’s job list shorter as we know that many people will be taking their summer holidays, and hope that this is an achievable list that leaves plenty of time for fun in the garden, and some relaxation too!
Roses and perennials such as Salvia Caradonna, shrubby Salvia varieties, Geum, Penstemon and Nepeta will continue to benefit from deadheading to encourage new flowers.
Watering would usually still be a priority this month, especially for newly planted gardens and containers. However, with the lack of rainfall and inevitable hose pipe bans, we need to think smartly about how we can collect waste water and conserve other water to use on our plants.
If you are going away, you may need to pass this information on to someone else who will be looking after things whilst you are not there:
Once the second flush of flowering is finished, the long whippy shoots can be pruned back to about 20cm/five or six leaves/nodes from the main frame. This is a light prune to help to control the size and shape for the rest of the year. Your wisteria will need to be pruned again around February – this is when a harder prune should be done. Right now we are just talking about a light pruning/shaping to control the size and help promote stronger flowering next year.
Now is a good time to prune lavender as it will allow for some regrowth before winter which helps protect the plant. You may well be asking yourself, why not wait until after winter then? The reason is that lavender gets woody and leggy, especially when left untouched or not pruned at the right time. Pruning it now will help to prevent this from happening too quickly. You can cut the plant back quite hard, making sure to create the shape you want. Don’t cut into the woody stems though as new growth is unlikely to come from here. Flower heads should be removed too – we like to save these for making lavender bags or just pop them into a cotton/breathable bag and hang this up in a cupboard/wardrobe.
Meadow areas may be ready for their first cut. Now that bulb foliage will have dried right back and if your annual wildflowers have finished flowering and set seed, you can mow. If you have perennial flowers that are still in bloom in your meadow, now is not the time to mow!
If your flowers are all finished, you can mow the area to allow the wildflower seeds to reach the bare earth and germinate. Mow the area but allow the cuttings to lay on the ground for a couple of weeks to allow for the seeds to hit the ground. It will need another mow in the autumn but the seeds will have dropped to the ground by then.
If you still have perennials in flower, just enjoy them for a while longer! You can leave the seed heads too when they form for birds to feed on.
Now is a great time to order your spring bulbs. Whether that’s to start making a meadow area, to add to your planting beds, to complement existing bulbs or for container displays. It’s always good to order early so you have lots of choice. We have a whole blog here with some of our favourite bulbs and places to order them.
Now is usually a good time to take stock of your garden, working out the parts you have been happy with and those that you’d like to edit, improve or change completely. This is trickier this year as, given the heat and drought, many gardens and plants are not looking as they usually would at this time of year. So, without being too hard on yourself or your garden, these are some things you could consider:
Are you happy with the colours in your garden? Have you got enough structural planting which looks good all year round? Do you need more height? Have you got a fence that you’re bored of looking at which could be screened with a shrub or climbers? Have you had relaxing places to sit in the shade when you have wanted them, or to enjoy the evening sun? Essentially, is the garden working for you and the way you want to use it?
If there are areas you want to improve, we suggest sketching out a very rough plan of your garden. You may need a few attempts to get it all down and roughly in proportion, but this doesn’t need to be to scale or overly accurate as you are not re-designing the whole thing, just thinking about a few edits. Mark up areas for improvement – maybe using a colour code for areas needing more colour or structure/a new seating area in the shade/a space to clear for veggie growing. Once you have your areas marked up you can make a list for each area of what needs doing.
If you need more planting, this is probably something to plan for next spring when hopefully water stocks have been replenished. But you could begin now by assessing your soil type and conditions, testing the PH level, and then researching suitable plants.
If you need help with planting up larger areas, considering a new seating area or other part of the garden, we do offer consultations to help you progress your garden without a full design – get in touch with some photos and we will give you a call to chat things through and see how we can help.
High summer is upon us! Here are our top jobs for July.
The most important thing you can do for your plants in hot weather is water them! Water your pots daily in this very warm weather and every few days otherwise. If you poke your finger into the compost and it’s dry around an inch or so down, it’s a good bet the pot needs water. Make sure you water into the soil/compost, not just over the leaves of the plant. Even when we do get some wet weather again, rainfall usually fails to get into pots as the plants block the soil and the rain rolls off the leaves, so be sure to keep them well watered over the coming months.
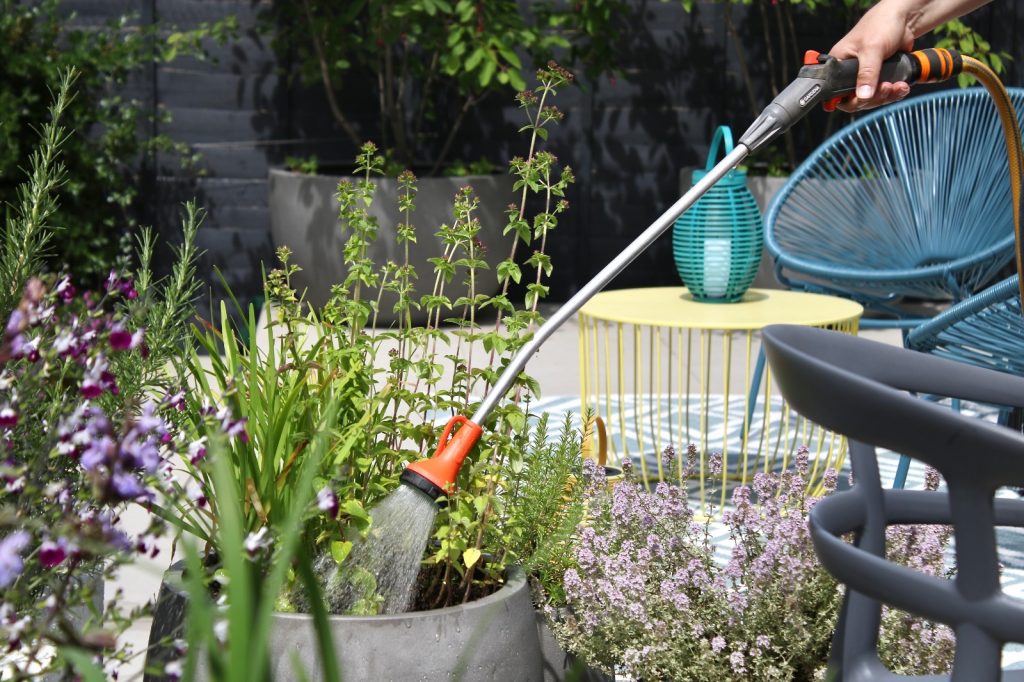
We recommend having a water butt to recycle rainwater if possible. These can be fitted to downpipes on the house or on sheds/garden rooms/garages and are well worth looking into if you haven’t already got one.
As well as watering your pots, it is also essential to water newly planted plants. We had a particularly dry winter and many plants – including evergreens – are really suffering from this now, especially in the current heat. Anything planted 18 months or less ago will still need watering regularly to help them establish (every 1-2 days for those planted this year, and 2-3 days for those planted last year).
Container grown plants will benefit from a feed every few weeks. Little and often is definitely better than a lot in one go, and take care because overfeeding can damage the plants. Many websites recommend weekly or fortnightly feeds. We find this can sometimes be a little much if using strong fertilisers so we recommend using a homemade feed or liquid seaweed. These are also more environmentally friendly.
Feeding is necessary during the plants’ growth period because container grown plants are unable to search for nutrients in the soil like ground grown plants do. Usually the starter nutrients in compost lasts around six to eight weeks so there is no need to feed newly planted pots until this time is up. For plants that are long term pot dwellers, regular feeding will go a long way to keeping them healthy.
There are many types of feed available. We suggest using organic feeds rather than inorganic. This means naturally derived feeds rather than synthetically produced plant nutrients. All feeds have three main components – nitrogen, phosphorus and potassium. The ratio of these varies from product to product as different plants require different ratios. You can google the needs of your specific plants but as a rule of thumb – high nitrogen feeds promote lots of leafy growth which can be at the expense of flowering, so for flowering plants at this time of year (roses and sweetpeas for example), and for fruiting plants (tomatoes for example) a feed higher in potassium is a good option. Organic liquid seaweed feed is an excellent all purpose choice.
If you are able to make your own feed you can use the leaves of comfrey or even the green alkanet that we have recommended removing below. You need to chop the leaves up and place them into a lidded container. Pack the leaves in and weigh them down with a large stone or brick. Put the lid on and leave to rot. The liquid produced in this process is the liquid feed. It’s smelly so best not kept near the house! Check on it every few weeks and pour out the liquid into a container. You can add more leaves at this time too. When using the feed, roughly use one part comfrey to ten parts water.
Now that the flowers on your Lilac have faded you can deadhead them to stop them looking a little unsightly. You can also do a light prune of the shrub to maintain its desired size and shape – if left to reach their full size, the flowers tend to be too high to see and most importantly smell! However, as flowering occurs on the previous year’s wood you do need to be careful not to take too much off all of the stems – just enough to control the shape. As usual with pruning, remove any dead, damaged or diseased wood and if you have two crossing stems pick one of them to remove. Please note, regenerative pruning for leggy or very overgrown shrubs should wait until the winter when the plants are dormant. However, if you have congested stems around the base you could remove a few of the oldest stems now. Cut these back to the base and your plant will thank you for the additional airflow.
This evergreen clematis is fast growing and comes under Pruning Group 1. This means it doesn’t need pruning to thrive, only if its size needs to be managed. Prune it to the desired size and cut back to just before a leaf.
Spring flowering, evergreen ceanothus will have finished flowering now. They only need a light prune, if anything, to help maintain shape and size. Side shoots and any dead, damaged or diseased stems can be removed. Later flowering and deciduous varieties shouldn’t be pruned now but rather in the Spring.
Philadelphus and weigelia can be pruned now that they have finished flowering. Take off around a third of each of the flowering stems, cutting back to where you can see new growth emerging. You should also remove around 20% of the oldest stems from the base of the plant to promote air circulation and reduce overcrowding.
As ever, we encourage you to only remove weeds that are competing with intended plants, or that can quickly dominate a planting area. Couch grass, bindweed, ground elder and green alkanet are four such plants that it is sensible to keep on top of.
Green alkanet is great for wildlife but can become very dominant and hard to remove if left to establish in planting beds. It’s a pretty wildflower that we do recommend leaving in some wilder parts of your garden if possible. It provides food for caterpillars and is a valuable provider of nectar too. It can however quickly establish itself and outcompete intended plants. It has a long tap root that can easily be snapped if pulled. It is best to dig the plant out to ensure as much of the root is removed as possible, otherwise it will keep growing back. If you do intend to keep some of it, you may want to deadhead just as the flowers are going over to avoid it self seeding.
Bindweed should be removed because it can choke other plants as it winds around them to climb. Again, care needs to be taken to remove as much of the root as possible. If it is not possible to dig out the roots of bindweed – for example because they are too close to other plants – regular hoeing or pulling is needed to prevent the growth establishing. If you do have bindweed check on the areas every week if you can to remove new growth as soon as possible.
Couch grass spreads via rhizomes underground. The problem is these can quickly take over beds, and also become entangled in the roots of your perennial plants and shrubs, causing them damage. As much as possible, couch grass should be dug out. One of our favourite tools, a hori hori, can be very helpful for removing the roots.
Ground elder is fast growing and can easily crowd out slower growing, smaller plants. It has a long white root that needs removing to prevent it from growing. Again, this can snap off easily so a hori hori can be a great tool to use to remove small plants, but a garden fork will be needed to dig out and successfully remove established clumps.
Don’t compost these weeds as the rhizomes will live on in the compost and then regrow. Instead add them to your council compost bin.
If you are noticing some container plants are failing despite being well watered it could be down to Vine weevil larvae. They become active around now and will eat the roots of plants. They are about 1cm long, white larvae with a brown head and often in a C shape. Have a check around the roots of affected plants and if you find any you can remove them. If there are lots you may wish to consider using a biological control of nematodes to get rid of them.
Climbing roses, sweetpeas, clematis, jasmines and other climbers really benefit from being regularly tied in – once a week if you can manage it. This allows them to focus energy on growth and decreases the chance of stems snapping. It also allows for their growth to be directed so if you are trying to cover a wall or fence, create a flower-filled archway or cover a pergola, tying them in the direction needed is essential.
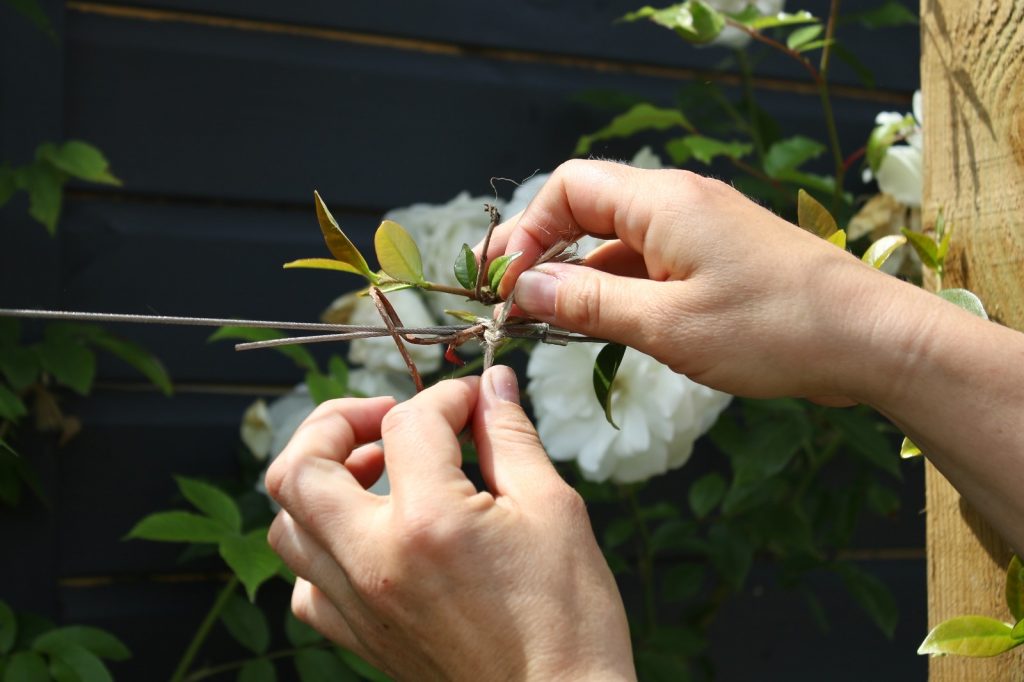
With sweetpeas, you can pinch off the tendrils as they aren’t needed for support once you have tied them in. They will cling to anything including their own stems and can restrict growth, become tangled or damage neighbouring plants. It’s also important to regularly water sweetpeas as they are thirsty plants. As soon as they start flowering, be sure to cut the flowers to enjoy in the house, or deadhead regularly. You don’t want to let them go to seed as once this happens they will stop producing flowers and start to die back.
Providing stakes for taller plants like delphinium, hollyhocks, dahlia and even sunflowers is always a good idea. If you didn’t do this during earlier growth and now have floppy plants, you can always add bamboo or willow canes, or you can use a half hoop plant supports which are more easily added into established borders and can help to stop plants flopping over pathways too.
Keep removing spent flowers from roses, salvia, geums and penstemon. Not only will this help the plants to look tidier but should promote more flowers. With roses, cut the flower heads off to the next set of five leaves, oir for leggy stems give them a harder prune to maintain good shape. With geums you should remove the whole flowering stem down to the base or to where a new flower is developing. Penstemon can be cut down to healthy looking leaves below the spent flowers.
Whilst there are several different types of salvias which do need different treatment in the spring, at this time of year you are just removing the spent flowers down to a healthy looking set of leaves (look out for new growth and flower heads emerging).
This seems drastic, but if you would like a second flush of flowers on your hardy (perennial) geraniums, they can be cut back to the ground and they will regrow and flower again this season. Using shears, cut back all the foliage after the first flush of flowers is finished, and give them a good water. They will regrow in no time. You can of course choose not to do this if you don’t want the gaps in your borders, but you can plant annuals into the gaps such as cosmos and zinnia if you would like. Just make sure you don’t plant too close to the geraniums so they have enough light and space to regrow this season by the end of summer.
With Nepeta, you will be able to spot where the new growth is emerging from the ground, and you can simply cut the spent flowering stems back to allow the new growth to take their place.
Bird baths provide an important water source during the dry summer months. Birds drink from them as well as bathe so make sure to keep it clean and topped up. It’s best to keep them away from bird feeders so food doesn’t drop into them and be sure to have a raised one if cats frequent your garden.
With all the warm weather, ponds will need topping up with water. It is best to use rainwater for this, so if you have a waterbutt you can use this to top the level up. If you don’t, you can fill some buckets (several of a size you can manage to carry when full of water) with tap water and leave them to stand for a couple of days. This allows the chlorine to disperse. If you aren’t able to do this, you can use a hose but be sure to put it on the spray setting and to allow the water to pass through the air before going into the pond so as to allow the chlorine to disperse.
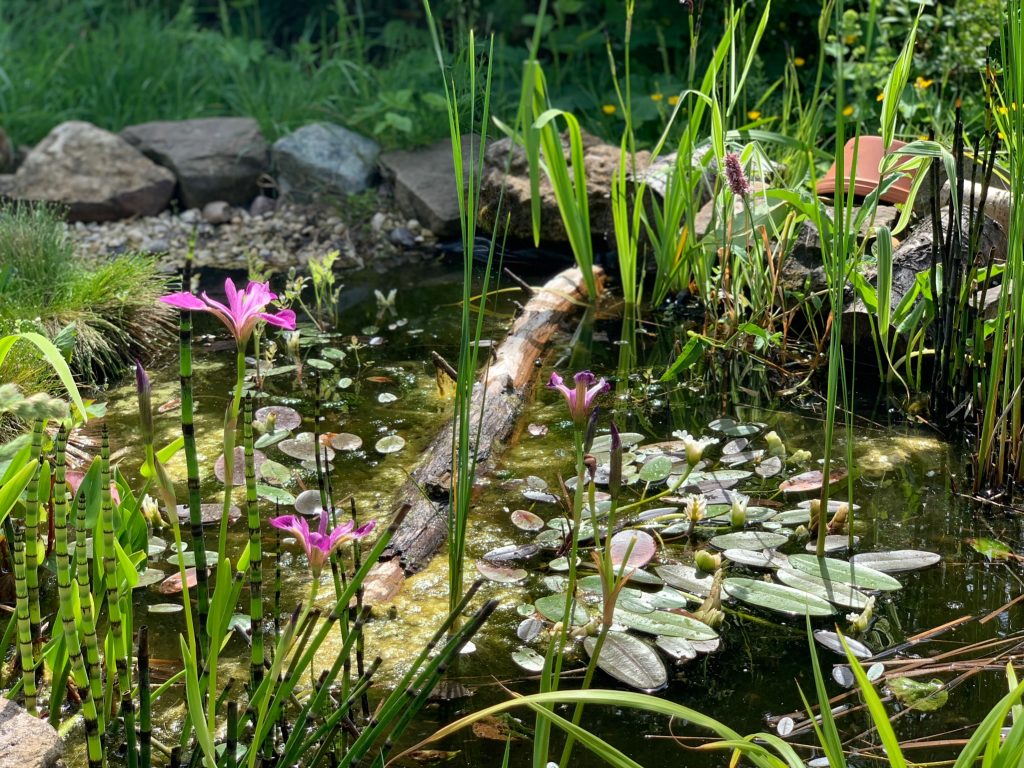
Blanket weed, pond weed and any overgrown or crowded submerged foliage can be gently removed and laid next to the pond for a day or two to allow any insects or newts to find their way back to the water. The weeds can be added to your compost heap.
We hope this helps you to keep things in shape this month. Happy gardening and keep cool!
May is the month when the growth in our gardens really picks up. The perennials will have reemerged and now are starting to take up their places in the planting beds, with some (geums for example) already in flower, and others promising beautiful displays for the coming months. It’s a time full of potential and a joy to be outside observing the new growth and flowers unfurling.
Next week looks set to be a scorcher so make sure you water your containers and any newly planted plants in your beds (this includes plants that have been in the ground for under a year or so). If possible, water early in the morning. This gives time for the plants to take up the water before the heat of the day causes it to evaporate from the soil’s surface, but also allows for foliage to dry out and not sit wet overnight which can sometimes lead to fungal diseases. Of course this isn’t always possible so an evening water is better than no water at all!
It’s important to be mindful of water use and use gathered rainwater if possible. Have you considered installing a water butt in your garden? You can fit them to downpipes on your house or a shed to collect the rainwater. It’s well worth the effort as it saves on water use and rainwater is better for plants and soil than tap water.
As well as making sure no plants go thirsty this month, here are a few other things to be doing in the garden…
First up is a job you can tick off straight away! Don’t mow your lawn. “No Mow May” is an initiative set up by Plantlife that encourages people to – you’ve guessed it! – not mow their lawn for the month of May. The benefits of this are huge for pollinators. Allowing wildflowers such as daisies, buttercups, clover and dandelions to bloom in your lawn provides nectar for them to eat. Plantlife run a wildflower survey at the end of May to record what flowers have shown up in the unmowed lawns too.
If leaving your whole lawn unmown doesn’t work for you, why not leave a strip at the back or along the edges. Every little helps and we’ve written a blog about wilder lawns here that includes some ideas for wildflowers that you can add to your lawns that not only look beautiful but are great for pollinators too. Have a read here.
Lastly, on the subject of lawns, if you have any patches that have gone bare or need relaying you should try to do this by the end of the month, or wait until the autumn. Sowing grass seed or laying new lawns in the summer is possible but requires much more maintenance and water so is best avoided if at all possible.
By now most, if not all, of your Spring bulbs will be coming to an end. Make sure you deadhead them (tulips, narcissus, daffodils, fritillaria) to give the best chance of reblooming next year. Removing the flower stem will mean no energy is wasted making seeds and that it all goes back into the bulb. Once deadheaded, you must avoid the urge to cut back the remaining foliage but rather let it die back. When it’s yellowed it can be removed without much force at all (if any). Tulips can be a bit hit and miss as to whether they return, with some varieties being more perennial than others. It’s always worth checking how likely reflowering is when buying tulips if you want to try to ensure flowers for a few years.
If you have any large clumps of bulbs that are getting a little crowded, you can lift and divide them now too. Carefully lift them from the ground (we find a garden fork most effective for this – don’t pull on the leaves), pull apart the cluster of bulbs into two sections, replant one in the existing space and plant the next where you want it to flower next year. Do water it in so as to help the bulbs settle in the new space.
We have been seeing a lot of aphids around at the moment. If you are too, please don’t be tempted to reach for the chemicals. Instead, you can pick off the aphids and squash them if they are causing damage to your plants. Hopefully birds and ladybirds will be attracted to your gardens to help manage the aphid numbers, along with hoverfly and lacewings (the larvae of which each aphids too). We are seeing more sparrows in our gardens at the moment eating the aphids off our roses which is great.
Spring flowering shrubs such as choysia, ribes, japanese quince, forsythia, spiraea and philadelphus can be pruned once they have finished flowering. First you can cut back the flowering stems. Take these back to a new shoot and be sure to take care with maintaining the overall shape of the shrub. Next, with large, established plants, you can remove a few of the oldest stems at ground level. This will reduce congestion and promote new growth. Check for any stems that are rubbing or growing into each other too. Lastly, as with all pruning, you should check for and remove any dead, damaged or diseased stems.
Take care not to disturb any nesting birds. If you think there could be a nest in your shrub, it’s best to leave well alone. Pruning of hedgerows should ideally be avoided until after nesting season.
Climbing plants such as clematis, jasmines, honeysuckle and climbing roses should all be tied in as new growth emerges. This is to support the plant as it grows, direct the growth to cover the desired area and help prevent the stems getting damaged. Once the stems are long enough, use garden twine to tie them to the structure (whether that be flexible steel wires on a wall or pergola, an obelisk or over an archway for example). Regularly check on growth so as to support the plants as necessary. Spread out stems in a fan-like shape if you want to cover a flat wall, or try spiralling stems around pergola legs.
Come mid to late May you can plant dahlias out into the ground. We always suggest choosing varieties with open flowers so that pollinators can benefit from them too. Dahlias provide wonderful colour from late summer until the first frosts and make for great cut flowers too. Some require staking so do check this when you plant them and get the stakes in place before they are needed.
It’s also not too late to plant out summer flowering bulbs – plants such as gladioli, crocosmia, nerines and acidanthera murielae (also known as Abyssinian gladioli). These will still flower this year and add some extra colour (and nectar!) to your garden.
If you have grown any plants from seed, you can now start to harden them off. This just means get them used to the outside – both the cooler, more fluctuating temperatures and the wind. You can start this by opening cold frame doors and leaving them open during the day time, gradually moving to leaving them open at night before moving the seedlings out of them and into their new positions. If you don’t have a cold frame and are growing your seedlings indoors, you can put them on trays to take out during the day initially and again build up to leaving them out overnight before planting them in their position.
It’s not too late to sow some seeds now if you fancy growing some border fillers or some veg. Some annuals such as cosmos and calendula can be sown directly where they are to flower now and will provide beautiful flowers that pollinators love too. Annuals are a great option for filling gaps in borders as well as providing colour and extra beauty to a garden.
Carrots, beetroot and radishes can be sown now for a crop this year, and cut and come again lettuce too. Sowing lettuce every two to three weeks ensures a bounty of tender salad leaves throughout the summer and into autumn that you can keep picking as you want it.
We have previously written about successional sowing of veg to elongate the harvesting period so even if you have already sown some veggies, you may wish to sow some more now for a later harvest. Cauliflower and purple sprouting broccoli seeds can be sown now too for a winter harvest.
Repeat flowering roses may start to need deadheading soon. This is a job that will reward you with more blooms so it’s definitely worth doing. For aesthetic reasons, you will likely want to snip off individual spent blooms from flowering heads so that they don’t detract from the other flowers on that stem. You can do this simply by cutting the single flower off. Once the whole flowering head is finished you should remove the stem down to the first set of leaves. This will encourage new growth and more flowers.
You can also deadhead geums at this time of year if they are going over. Be careful not to remove developing buds along the long flowering stems, just the spent flower head.
Lastly, as ever, there may be weeding to do but we always caveat that with the reminder that weeds are just wild flowers. As long as they aren’t outcompeting your intended plants for space and nutrients, it’s fine to leave some for the pollinators to make use of. You can always remove them once they have flowered, before they go to seed, or leave them towards the backs of borders or in a designated “wild” area in your garden if space allows.
We love May in the garden, there’s so much potential plus the first flowers to enjoy. We hope you manage to get some time out in yours this month. Happy gardening!


Gardens by Anna Butterfield offer professional garden and planting design across London and the South East.
Our expert, organic garden care service is available across South East London as well as parts of Kent and Surrey.